StewMac Safe-T-Planer Video
V-0486
Dan Erlewine shows how to create smooth, planed surfaces using your drill press. Our Safe-T-Planer is the affordable way to add a planer to your shop. In your drill press, it planes wood to any thickness, leaving it smooth and ready for sanding.
Video Transcription
Dan Erlewine: There are plenty of reasons to have a planer in a guitar shop. Thickness in a bridge blank to size, thickness in a fretboard dimensioning the lumber. Here, I'm going to taper the back of this mahogany neck blank to be like a 1930s Gibson. Fat and chunky near the nut, taper into the tip. A planer's a great tool to have, but a lot of shops don't have the room for one, and they're expensive. This is the StewMac Safe-T-Planer. It's a rotary planer that fits in your drill press.
How it works
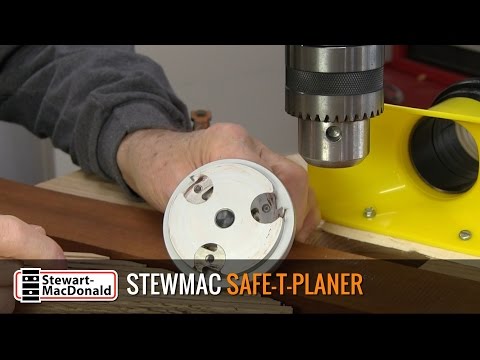
These cutters do the work. They can cut a path two and three quarters inches wide. They're recessed into the bottom of the tool, this is called a platen, so only five thousandths of the tooth sticks above that. That means once the work enters into the rotating cutter, it's held down by the platen. That's why we call it Safe-T-Planer. And each cutter has two cutting edges. So when this gets too worn out, you loosen it, spin it around to the fresh edge, and you're in business. Extra cutters are available, too. I was always taught by a machinist friend of mine that when you put a drill bit, or any tool, into a drill chuck, that you tighten all three sides, and as you put the part in, you give it a little twist as you're tightening.
Using the Safe-T-Planer
I'm going to thickness this rosewood bridge blank down to approximate bridge size. And I can get two Martin style or Gibson out of that. The rectangular ones. If it's rough wood like this, lay it down and see where it rocks. Take the least rocky side, that's this side, and lay that down. This is pretty good right there. I'm going to run half of it through, flip it around, and run half of it through. And use a push stick. This little notch will catch the end of the bridge, and let me shove it through and keep my fingers out of the way.
[Dan runs the bridge blank through the Safe-T-Planer]
There's a pretty smooth cut there, and it's flat now. So I'll do the other side. Take five thousands off of that. And to do that, I run it under and bring the platen down to the piece of wood. I know it'll start cutting at that point. You don't have to plane just flat surfaces with this planer. I want to put a taper on this, that old Gibson taper from fat to thin on the peghead. My difference from this end to that end is about a quarter of an inch, so I glued a quarter of an inch on the bottom lightly with superglue to shim it up. That way, I have the same measurement to the pencil line, and I'll plane right down to it.
[Dan runs the tapered peghead through the Safe-T-Planer]
Here's the tapered peghead.
Dan's Safe-T-Planer table setup
My table is two half inch pieces of good quality plywood glued together, and I've bolted it to the steel table from underneath. And this is my fence that pivots on one end so that you can do narrow and wide pieces. I could take a piece of spruce like this and make multiple passes much wider than this. Then move it over. You get the idea. You can build a guitar with this. You can do the sides and the backs. The hole in the center of this fence is the diameter of the cutter, so I can bring that down, lock it in place, and run skinny parts through, little narrow pieces. This is a Safe-T-Planer, and it works great.

