StewMac Rosette Router Base Instructions
Cuts soundholes and rosette channels that are clean, accurate and repeatable. For guitars and ukuleles.
Fits these rotary tools with a 3/4-12 threaded plastic collar:
- Most Dremel models made since 1986
- Black & Decker Wizard™ and RTX™
- Foredom Custom Handpiece from StewMac
Instructions
Plywood workboard
Use 3/4" plywood, large enough to support the entire instrument top. Drill a hole for the 3/16" pivot pin, in a spot that will align with the center of the instrument’s soundhole.
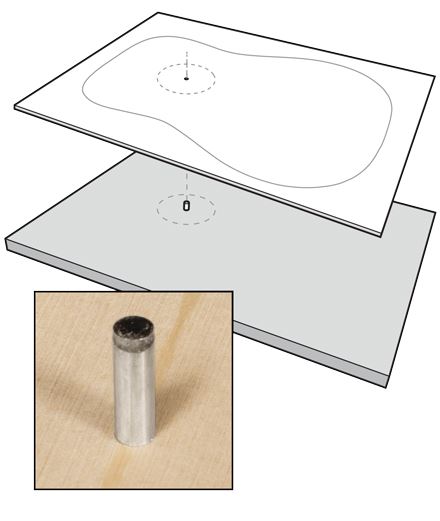
Drill this hole perfectly square to the plywood, so the pivot pin will not lean at an angle. Choose a drill bit sized so the pin presses tightly into the hole, without any play. Drill all the way through the plywood, using its full thickness to securely hold the pin. The pin should protrude from the surface by about one-half inch.
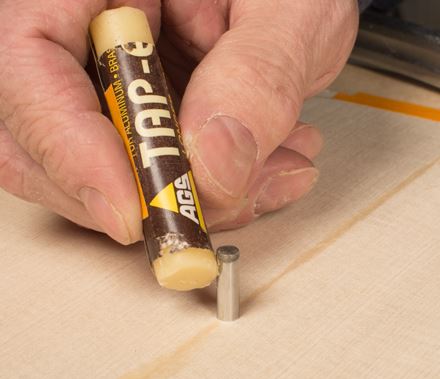
Fit the guitar top onto the pin, laying it flat onto the plywood workboard. The measurement holes in the base of the jig are a snug fit on the pivot pin. Lubricate the end of the pin with Tap-Ease Cutting Lubricant or wax for smooth rotation.
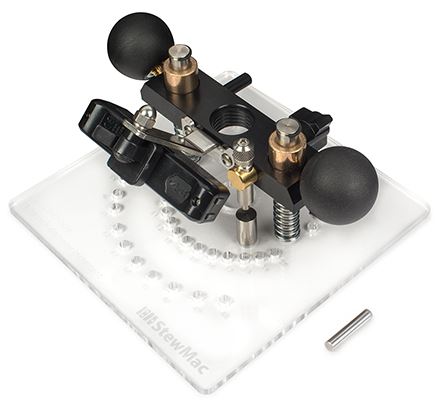
Plunge router setup
Unscrew the threaded plastic collar from your rotary tool, and install your cutter bit in the collet. Downcut router bits are the best choice for clean cutting. Screw the rotary tool snugly onto the plunge jig.
The ball grips used to guide the tool also control the plunge lock. Loosen the grips to plunge, then tighten to lock the unit in place.
Use the primary depth stop adjustment to get you in the ballpark, then use the micro adjustment to dial in your exact depth.
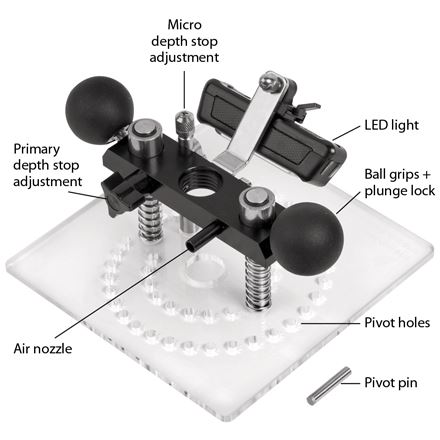
Set the micro depth stop adjustment to the middle of its range for adjustment in either direction. Each full turn of the knurled knob gives approximately 1/32" of adjustment.
The rechargeable LED light cycles through three brightness settings. The included micro USB charging cable can be used with any USB power adapter capable of handling 500 mAh.
The air nozzle is for attaching our Mini Air Pump to blow away dust while routing.
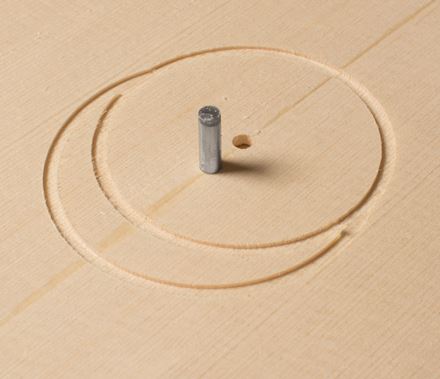
Base plate pivot holes
By pressing one of the base plate holes onto the pivot pin, the router works as a compass. It rotates around the pin, cutting a precise circle.
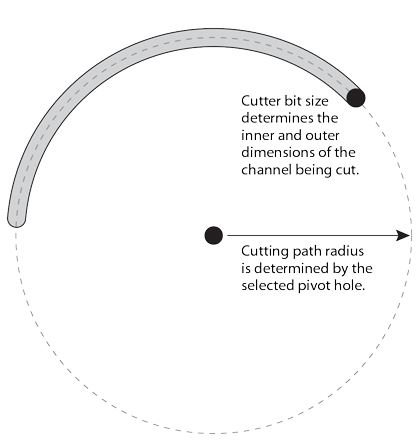
The pivot hole determines the radius of the cutting path. The cutter bit size determines the inner and outer dimensions of the circle being cut. With a 1/8" bit, the jig creates circles ranging from 2-1/8" to 5" in diameter.
The pivot hole numbers are not measurements; they are reference numbers so you can note and recreate cuts.
The holes are evenly spaced, radiating out from the center in increments of 1/32". Moving the pin from one hole to the next changes the radius of the cutting path by 1/32" and changes the diameter of the path by 1/16".
Most rotary tools have a small amount of play in the armature. This can slightly affect the diameter of the cut. For this reason, it's necessary to do test cuts on scrap wood to determine your exact diameter before cutting the instrument top.
Measure the depth of the rosette being installed, and set your cutting depth slightly shallower. This way, the installed rosette sits very slightly higher than the suface of the intstrument top. Scrape or sand the rosette to make it flush.
Take care not to let wood chips get under the jig, which will cause an uneven depth of cut.
Cutting the soundhole
After the rosette rings are routed, the soundhole itself can be cut out. Rout 3/4 of the depth using the router bit, then finish the cut using a razor knife for the cleanest edge.
Creating off-center designs
By drilling a second pivot hole, you can create intentionally non-centered custom rosettes. In the example shown, after a centered rosette channel was cut, a second channel was created using the alternate pin location. The wood between these channels was cleared out using various pivot holes on the base.