Real Repairs: Fixing a Broken SG Neck
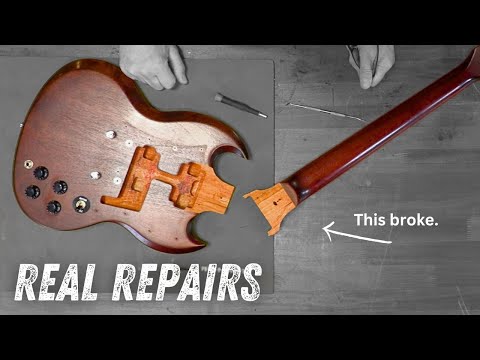
A tragic accident—this Gibson SG took a fall, snapping its neck! But is it game over? In this video, StewMac tech Gene Imbody walks you through the techniques he uses to bring this classic guitar back to life—stronger than ever.
Watch as he carefully preps the break, applies expert repair methods, and fine-tunes the finish to make this SG sing again. Whether you're a luthier, a DIY repair enthusiast, or just a fan of guitar restoration, this is one repair you don’t want to miss!
Video Transcription
Gene Imbody: Welcome back to the bench, folks. Today, I am super excited to introduce you all to a new series we're calling Real Repairs. Unlike the normal, highly polished, refined instructional videos you're used to seeing from us, this is going to be a candid, informal, behind-the-scenes look at actual repairs you see in a lot of pro repair shops, like a StewMac take on a repair shop reality show.
And our first episode is a real doozy that I think you're going to love. If you have any ideas for specific repairs you'd like to see us tackle, let us know in the comments below. You never know, maybe we'll take it on. So sit back, relax and enjoy Real Repairs.
[Fast electric guitar music]
[on-screen text reads: Real Repairs with Gene Imbody]
How Bad is it?
So we had a bit of an accident here in the StewMac studio. While we were shooting a short video, this unfortunate guitar had a little run-in with gravity on the wall behind us here (beep). Whoo, this is a guitar that belongs to StewMac for demo purposes. It happens sometimes. Obviously, nobody was expecting that to happen and it was quite a shock, but it's pretty good place for something like this to happen. I'm not sure yet what this is going to take to fix. We'll figure that out as we go. Let's see what we can find here.
The most important thing is don't touch it. When this happened here, we took this guitar exactly like you're looking at and we propped up the neck. The strings are holding it on there, but we took pressure off of this neck and we left it sitting here until we could set up and shoot all of this. I'm looking at this for the first time along with you folks. If we can keep this crack nice and clean and fitting back together like a jigsaw puzzle, it's going to be stronger and it's going to look better. Let's get the strings off of it and see what we're dealing with.
[Slow bass music]
All right, let's get the pickguard and these electronics off of here. One screw might be the only thing holding this neck in at this point. Oh, wow. Yeah, look at that [Gene unscrews the pickguard screws and slides the neck out]. Yeah, that was only being held on there by the pickguard screws at that point. That's a pretty gnarly break. So this is like a compound fracture, because it's broken away from the body. Even within that break, there are some cracks.
So if we have breaks to repair within breaks, like I said, we're going to be careful not to touch this stuff too much or fit it and refit it too much. We're going to come up with a game plan for clamping this. That's the most important thing is to be prepared that when you glue it on, you're ready to clamp it and you have a good solid way of getting this all clamped. We're going to be just fine. So let's get this off of here [Gene removes the pickguard].
Okay, so we have some splinters down in here. So we want to save these, especially the ones like this that have finish on the front of them, because that's probably from somewhere around here. Perfect puzzle piece right there, but we're going to save that so we can get it put back in there. It's not like if this stuff was missing that it's a major problem, but the more of this we can preserve, the better.
I don't see any other cracks or anything going on here like we have on this neck. This little piece is loose, so we need to be careful not to knock that off while we're working. We don't want to make this worse in the process, so it's important to just get a good sense of what we're dealing with here. This was an old vintage SG. Thank God it's not. I might not take this pickguard off if it had all original solder joints and things like that. Those are considerations you always want to take when you're working on a vintage guitar.
Something like this, we're going to disconnect this pickguard and get it out of our way. And these pickups plug into the circuit card right here. So those'll come off real easily, and these wires should pull out and this whole pickguard ought to come out of here. I'm going to put the cover back on just so these wires aren't flopping around. Don't want to break them or have them get in the way. Let's get the strap button out here. See how that's loose? I don't want to move it too much.
Something like this, if that breaks loose or it gets jostled, it can make this whole thing not fit back together. Because in order for this to work, it needs to be a good solid glue joint, like the tenon here that hasn't come apart or the seam down the middle. It's like any other glue joint. If it fits together cleanly, it's going to hold. If it doesn't, you're going to have problems. This wasn't a glue failure. This whole break is completely structural. It's all wood.
The neck tenon is right here and it attaches here, and the mortise is right here. This little smiley face you see, that all pretty much held. The only break through a glue joint was right here. This isn't as much a neck break as it is a body break. They all break a little different. The other thing we need to consider is, like here we have some glue. So this glue right here came off of right here. And then, you can see on the neck we have fibers of glue and chips of wood. It mates with the glue that's missing here. We have to make a decision.
Ideally, I'd like to clean all this glue off. I want all the old glue, any debris that's not part of the wood to come out of there. The problem becomes is getting out of there without creating more loose wood, more splinters, loosening the loose splinters even more, and knocking them out of there. If this hardened glue fits lock and key back in with this piece here, if I clean it out of there, I might make it fit worse.
What's the worst scenario? Trying to glue glue to glue with more glue, or trying to clean glue out of there and also making the fit worse? I'm more inclined to leave this glue. These are all the things that we're trying to figure out right now in the early stages of fixing a break like this. Not worried about this, this is going to be fine.
I think now I'm going to spend a little time very carefully putting this together once, and I might try to dry clamp this. Actually, dry clamping it is my preference. I really want to practice clamping this first, because that's where you're going to have trouble. If you get glue in here and you find that you're having a problem getting these pieces fit back together, it's almost too late at that point.
Let's put this on a vice. So we have a crack right here, falls all the way to the end of the neck heel. It's just important to get a sense of what's going on with it, because if I need to glue it, I'm going to have a hard time getting glue in there, because it's so tightly closed. So this potentially is one of those areas, well, in order to fix it, I got to make it worse. I need to crack it open further so I can make sure I can get glue in it, or I have to use a different glue.
Using water-thin super glue is definitely an option. It's not a great one. Super glue is very sticky. It'll stick to just about anything, but it's super brittle. It breaks easy. So it's not great for structural repairs like this. I'm not against using it in some places if I have to, but I prefer not to whenever possible. It's just a hairline crack right through here, and then I can even flex this just a little bit and I can see another crack all the way through here.
So we need to make sure we get some glue inside of that. Let's flip it over here. This one is easy. See, pulls right open, and when we push on it, it goes right back together. So then back to the body here. Let's take a look. So this loose tooth here, I'm going to pull this out of here. But I don't want this coming apart when I try to dry clamp this. Just like in the neck where we have these hairline cracks that aren't easy to see until you flex them, I want to make sure if there are any on the body like that, that I'm aware of them as well.
And i don't see anything, other than the obvious stuff we've already pointed out here. Let's see what happens when we carefully, very carefully try to get this neck back in here. At the point of which I know I can get this back in here cleanly is when I'm going to stop. If that's all the way in and clamped, even better, then I can dry clamp it. If I feel like it's going, but I'm knocking splinters loose and I'm making the joint worse, I may stop and just say, "Let's go for it."
The other thing I'm going to do is take the tuners off. They're putting weight on this peghead and it's going to, it's making it want to do this. So let's get this extra weight off of here before we start doing this here. So when this came apart, it slid out this way. I'm not going to try to come back in from the top. I think we're better off coming in this way. So I'm being very careful. This sliver right here, it's like a slot, key slot here. I need to slide into this.
And this is going to be a little tricky, I think, because of this piece. This needs to slide in going this direction. It won't go in through the top, but the problem I'm seeing then is the other side wants to come in through the top. It doesn't want to slide in this direction. There it goes there. There, there we go. Look at that. That's going to be beautiful.
All right, so here's the crack on our other side. This wants to fit better going down, but this is all still going to mate pretty clean, I think. I'm not going to force it together anymore. It's almost together now. I'm going to stop here. I'd really like to dry clamp this, but I'm pretty confident at this point it's going to go back together cleanly.
Since it's an SG and I've got a flat surface, and a flat surface, this ought to clamp up pretty easily. So as much as I would like to clamp it all up and take a look at it under clamps and make sure everything's lining up carefully, I think I'm going to trust that it's going to do that.
Now, if I clamp this up after it was glued and I take it back apart and I have gaps in here or gaps over here, that's also a good sign that I'm out of alignment. That's bad. I'd feel better if I could dry clamp this, but I think at this point, I've seen what I need to see. We haven't knocked anything else loose. Everything looks good.
Applying the Glue
So I'm going to use some Titebond III for this. This just gives us a little extra insurance, and it's a little stronger, and it's going to give us some more open working time. I'm going to pick out some clamps. We're going to prep some cauls that we want to use to sandwich all this back together, because we don't want to clamp right on bare wood, and cauls are going to spread the force out more evenly and make for a better fitting and a stronger, more reliable joint. So let's get a game plan together for that. Let's get some more cauls. Let's grab our clamps and we're about ready to get to it.
All right. So these are the needles we carry and the syringe we offer. It works great for this stuff. The needles we have are blunt-tipped, but I still also like to have a regular needle with a nice sharp clean tip on it in case I do want to pierce into a joint. But I'm going to take a couple of them, too, and just sand an angle on the end of them too.
Glue brushes, one thing you want to watch with these brushes is they tend to shed, so I'm going to make sure there's nothing loose, and I'll probably get some that come out along the way too, but be prepared to pick anything out that might come loose. Even a little hair from a brush can interrupt how this whole thing fits back together. [Gene fills the syringe with glue] It's way more than we need. We're about ready to do this.
I think I have anything I could possibly need. The first thing I should do is get glue into these tight cracks. Need to first make sure that those are good. I don't want to have glue all over both of these surfaces and then try to be figuring out if I've got these cracks solid or not. I think I might start with one of the small needles that I put an angle on here. Yeah. Open this up and get a needle through the front of it.
This is all open cavity space right here, so I don't really care so much if I leave a hole right here to get inside of this crack if I can force glue all the way inside of it, on both sides here. This one's a piece of cake, it'll go right in there. No problem.
Okay, I think I'm going to come in this way and try to get a needle as deep in there as I can get without causing any damage. That's going to keep it from going back together. That's the tricky part. You don't want this to tunnel through that wood and push out wood fibers and keep it from going back together, but if I don't get glue in there, then it's not going to be stable.
[Gene sticks the Glue Syringe into the crack]
Now, what I'm looking for is to start seeing glue squirting out through this crack everywhere. There we go. It's a good sign. There we go. That's what I want to see. This glue squirting through the other side into that fine hairline crack. I'm going to just wobble this carefully without breaking it loose. That's going to suck that glue all the way into that crack. It's going to wick it into place, and when I see it coming out this side, I know I've really got enough in there. There we go. Look at that, perfect.
So our next problem is this crack that runs through here. I don't think I'm going to be able to force glue all the way from here down to here, so I need to figure out what to do about that. This hairline crack I don't think is a major problem. I can't get it to flex or come open. I may run some super glue in there when we're all done. I don't know. I think it's more of just a little stress crack that happened in the process of this.
But I do have this gap between the tenon and the mortise that's still left, and that's plenty big that I can get a good size needle in there and just start forcing glue in there. And hopefully some of that extra glue, adhering it to the side of this tenon and maybe working its way in is going to give us a little support. Certainly not going to hurt anything.
I think I'm going to leave that crack be. I'm going to wait to flood that with glue. And when I do that, it's going to spill onto this surface, but I don't want to do that until I'm ready. I'm still going to put in a lot more glue than I actually need just to make sure it forces everywhere [Gene uses the Glue Syringe to inject the glue]. There we go. That looks good. All right, let's go ahead and get some glue into here [Gene injects more glue using the Glue Syringe], and then we'll turn our attention to the body here.
Just lightly brushing, spread that glue out [Gene applies the glue using a Glue Brush]. I'm going with the fingers of the grain, are all going this way. I'm trying not to come up this way to pull them loose. When I put this together and I clamp it, you're going to get glue squeeze out, coming out everywhere. Going to be neater about this when I clamp it all together, but let's get some glue back here too.
Let's take a look at the body here now. So we found a couple of places here that we wanted to work glue into [Gene applies glue using the Glue Syringe]. There's some space between what was the bottom of the tenon and the bottom of the mortise here, which is common. A little bit of space in that joint. Is that out of the question? And we're just going to fill that with glue while we're in here. And this one, I'm going to work this direction, because the fingers of the grain are sticking out here.
Clamping the Neck
So I think I'm going to start with that big clamp and these two cauls, and just try to get this thing on here, make sure it's closing all the way, and that my alignment is pretty decent. There it goes. All right, so that crack closed up on that side. Let's see what the other side looks like here. This side's going to take some clamp pressure. This was the one with the hairline crack in it, I think.
So when I clamp that I need to make sure I don't open that up or I don't tilt the angle. I don't mess with any of the integrity of how this is all meeting really cleanly right now, because that's going to set our alignment and our angle. I'm familiar with this guitar so I know it was on their right. Some Q-tips to really get down here in the corners.
This glue is starting to thicken up a little bit. Not a big deal. It's not an emergency or anything, but the thicker it gets, then you might want some hot water, soften it up a little better. That's good for now. We're going to get a bunch more squeeze out when we put clamps on this. I'm going to put this back in the vise so I can free up my hands to get these clamps on. As I push into the body, I'm getting some squeeze out back there and that's good.
Now let's get some clamps around here and maybe get this chip in here before the glue sets up anymore. Let's get this in here. We have our missing piece in there. I'm going to try and get a flat caul on this and press it all back down. And hopefully, it goes. Come on. All right, looks pretty good. Let's get some clamp pressure down on this side now. Anytime you put a new clamp on and it squeezes some glue out somewhere, you know that clamp is doing some good.
The last thing I think I need to deal with is this little proud lip we have on this side, and get it as good as I can in the end. If I can't get it out of there, then we'll just deal with it. It's going to look a whole lot better if I can get that thing to close. This is the beauty of rubber bands here, so we can come in here and get some weird pressure on here at a weird angle.
Okay. The seams that I can still see look good. I don't see any shifting side to side. My clamps are all tight and stable. Okay. We're going to let this sit for at least a day. Then we'll take the clamps off and clean everything up, and we'll come back here and we'll see how we did.
[on-screen text reads: 24 Hours Later]
Clean Up and Burnish
Okay, so we're back. This has been clamped up for a good 24 hours or so. So let's pull this all out, take it apart, and see what we have to work with here. Under different circumstances, I probably would've done this in the neck jig, or I've even made specific fixtures to help hold all this together and make the clamping go a little smoother and ensure it all lines up. But I think it's really good to do this stuff and show that it can be done pretty simply as well, too, pretty effectively.
If I was to grade myself here after doing all this, I should've spent a little more time, maybe, putting a little tape or barrier down against these rubber bands. That can sometimes be a problem. Hopefully, we get these clamps off and we see that everything is perfect. All right. So far, so good. Everything looks good. I'm liking what I'm seeing here. This looks fantastic. This came out great. I'm meeting along the heel like we talked about. That's good and flush and nice and clean.
We're meeting the joint along the edges of the heel as well, which means we have the same angle as we had before and the cracks all look really good. They're nice and flush everywhere. Everything lined up really well. And from a few feet away, it's hard to even see these cracks. What I'm going to do now is make a decision about what kind, if any, touch-up we really want to do to make this look better, and then we'll work on getting this back together and playing again.
Okay, what I think I need to do next is go through and clean off any dry glue residue that we missed. Managed to get most of it, but there's a few spots here. Let's get that off of there and then see what we can do about smoothing this crack out a little bit. There are few places where I would've liked to have gotten it a little more flush, but that's as close as we got it and it'll be fine, and I'll show you how to fix that. Warm water, not too much. We don't want to soak this finish or anything.
Just looking for shiny spots. It's usually pretty obvious. Don't worry too much about some of this glue in the front here. Doesn't look too out of place. Something Gibson would've left probably anyway. Let's start on the treble side. So what I'm trying to accomplish here is I have just the slightest little bit of a lip. It's all nice and solid, but it just didn't mate perfectly right here. So, for that, I'm going to use a burnisher.
To burnish is basically to rub or press the wood with some friction and some pressure to smooth it out and push it back together. We're going to mold it. You can use a hardened steel rod. That works really well. I use that for a lot of different things. One thing I like to use a lot is a piece of bone. This is a quarter-inch bone saddle blank that I've taken and shaped the end and smoothed all the edges, taken out all the scratches. I think I sanded out probably 1,000, 1,500 grit, and then polished it out on the buffing wheel, so it's very shiny, very smooth and very hard.
So I'm going to take this and use this to push the wood back together and try to get that little smoother. You might be wondering why I don't just sand this clean, and that's what a lot of people would do. And sometimes, that might be the right thing to do, but I'm going to remove wood if I do that. I'm going to remove color if I do that. I'm going to create more of a situation where I have to do touch-up.
If I use the burnisher and I don't get the results I want, sanding is still an option, but if I start with sanding, then I'm stuck down that course. So I'm going to try the burnisher first. And usually, this gives me what I'm after, so let's just get in here and try to push this down little bit. I'm using good pressure and just ironing this out.
This is more about feel than look, so I'm going until it feels good on my finger. And right there, even just with that little bit of burnishing on that edge, you can see it already shine back up. And to my finger, it's invisible now. I can't feel it on the corner. So there are times you may not want to do this. If I had a really thick lacquer or polyurethane finish, I definitely wouldn't want to do this. This is working on this guitar specifically, because it's barely got a finish on it.
Okay, so this side's a little bit worse. We have a spot right here that's sticking out pretty high. Let's concentrate on that first and see if we can get it pressed down a little. The main thing here is not to take a corner or anything with an edge. I want to spread that force out as much as possible and push all of this area down. It's a good technique for a lot of different things. That's pretty good. I'm going to stop there.
Let's look along the top here. So we have the cracks along the top here and those aren't as important, because we have a pickguard that's covering a lot of that up. They stick out from the edges here. Let's just see if we can push those down a little bit. But we don't have to go crazy on these. We can just push them in the corners here and see if we can get them just a little better.
And again, if this had finish on it, I wouldn't be doing this. We're essentially dealing with a guitar that's been oil-finished here. We are still missing a little chip right here and I do have that. It's not important and nobody's ever going to see it, because it's under the pickguard. But since we have it, we might as well just glue it back down.
It's the chip we saved. It's not exactly the same shape it was when it came out, because we've glued it in place without it being in there. I'm going to take the backside of my burnisher here, coat it with some accelerator, burnish it like all the other ones. I even see some glue here I missed. Look at that. Now, I think next, I'd like to come in here on some of these cracks that are missing some color. Just see if we can bleed a little bit back in there, just to make them a little less obvious.
Touch Ups
So let's get some color out here and see if we can do that. All right, we're not going to do anything fancy here. I'm going to use a red mahogany touch-up marker. These work pretty well for little things like this, and the colors usually match Gibson colors pretty well. The one thing I always recommend when you use these is to not use the tip. The paint comes out really fast and it's a really broad stroke, and you often get too much, unless you're doing some big, open area.
And then, once you use the tip once, you really don't want to use it again on something else. So just depress it onto some clean glass, back of a mason jar or something works pretty well. And then you can keep the tip clean and then work from this paint here. I'm going to use a Glue Looper again. I also sometimes like to just use an X-ACTO blade, because it can really poke right into the crack.
This is nitrocellulose lacquer, which does take a while to dry. But we don't have to really worry about that, because it's soaking into the crack and I'm not putting a ton in there, and it's going to flash off and we're not going to have to give this days to dry or anything. I want to make sure, too, that I don't have any glue that's going to prevent the color from absorbing into the crack. I can see through the color and I can see bare wood, but it's under a layer of glue, and then color won't penetrate.
We'll start here with these cracks that are under the pickguard to give us a chance to practice where it's not going to show. And also just to make sure, we'll take a little bit of this color on some mahogany here in the center, just to make sure we've got a decent match. Let's start with this one here. This one's completely hidden. Scrape it clean. It's still not a hundred percent flush. Just drag that glue looper along the crack. If I get any paint on the surface, I can just quickly wipe it off.
It's pretty good. If that was a place that was really showing, I might come in with a little bit of black and some spots to break that line up, to make it look a little more like grain. Like I said, we don't need to do any of this, because it's hidden, but it's just a good example to show you how we touch up cracks like this sometimes. We're getting away with a lot of this and being a little haphazard about this, because all the color we're looking at in here is on the surface.
Whatever sealer or lacquer, all the color is right. There isn't some thick, clear coat, so it's allowing us to get color down into here. And I'm not as concerned about damaging the clear coat and having to come back in. Something like this is actually pretty easy to touch up.
Part of the hard part about touching up a thick gloss is, even if you get the color and get it all leveled out right, is then matching the factory buff. We'll give it a few minutes to just dry up, because I want to take a look at the pickguard next. There was a crack at the end of the guard, a little chip missing. Let's see what we can do about that.
Okay, we'll put this over here. Nah, I'm just kidding [Gene laughs]. Okay. Okay, so we have a corner broken off the guard here. It fits together pretty well. This is ABS plastic. If this was celluloid, I could use some acetone and melt this back together, and it would look pretty good. I think the best we're going to do on this one is to super glue it and just see if we can get it working for now. So let's just put these together like a jigsaw puzzle.
A little bit of squeeze out there. That's fine. Hit it with some accelerator. Looks pretty good. See if we can clean that up a little bit. Essentially, we treat this the same way we treat a finish. Start out in the low end, move up through the higher grits. We don't even need to be crazy about it. This is a guitar that's been played a lot, has scratches all over it. We're not trying to make it look perfect, but just smooth out the crack, any super glue or accelerator overspray off of there.
That doesn't look too bad. All right, I'm going to grab a little bit of scratch remover. The scratch remover is really great on plastic, for pickguards and things like that. I really like using the stuff for that. Get a little bit on there and let it haze up for a second. Not bad. I think we'll just call that good. This isn't a perfect pickguard anyway, and our crack looks like a scratch at this point. It's fairly solid.
Restring and Test
Okay, I think it's time now to get this guitar back together and get it strung up, and see how we did [Blues music playing. Gene installs the pickguard, the electronics, the tuners and restrings the guitar]. All right, it's holding tune. That crack looks great. Everything is nice and solid. You can barely even see it. We could make that totally disappear if we wanted to spray a little bit of tinted lacquer over it, a little of that same red mahogany shade.
Even our pickguard crack came out looking better than I expected. I don't know that we're going to need to put a new guard on this. This looks fine. And now we just need to plug it in and see how it really sounds [Gene plays a fast paced song on the electric guitar hooked up to an amp]. All right, thanks for sticking with us, folks. We'll see you at The Bench next time.


