Loose brace in a Martin D-35: how to fix the rattle
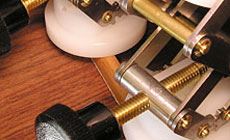
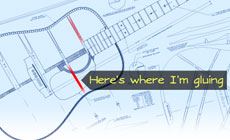
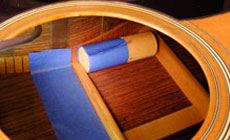
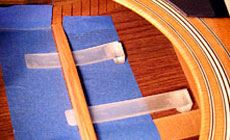
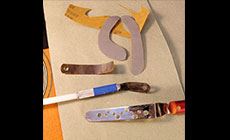
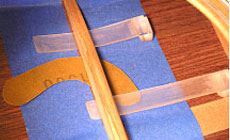
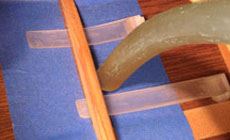
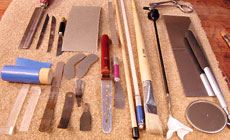
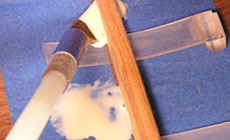
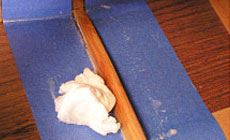
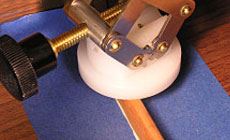
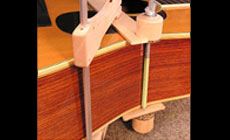
The furnaces are turning on... 'Tis the season for dry, rattly glue joints. Two braces on this Martin D-35 have come loose from the back. The gaps are hard to see, but I can hear them rattle by tapping on the back. It's a pretty common problem, and I've got a good way to reglue them without making a mess inside the guitar body. Both gaps are about 4" long, between the center strip and the kerfed lining at the side. One is in the upper shoulder, and the other is right below the sound hole — that's the one I'll fix here, since it’s easier to photograph. The gap under the brace is narrow and tough to get glue into. But I've made myself some glue-up gizmos to help: gap-spreading wedges and flexible gluing blades. This low-tack blue tape is used by glass shops when replacing car windshields. I use masking tape to fasten a strip of this blue tape to a wooden dowel, adhesive side out. Then I unroll it along each side of the brace, right up close, but not onto the brace itself. The tape goes on both sides, a right-hand roll and a left-hand roll. I band-sawed these shapes from 1/2" acrylic, then filed them to a gradual taper. By pushing these under the loose brace, I open the gap enough for cleaning and gluing with abrasives and thin flexible blades. I use lots of thin strip-shaped devices for cleaning the gap and applying glue. I cut down an X-Acto knife (the blue item here) and tapped the end of it to attach a flexible nylon dowel. By cutting a precision saw blade to fit this, I get a good long-reach glue applicator. The holes I drilled in the disassembly knife allow it to slide glue into tight gaps. My boomarang-shaped pieces of micro finishing paper reach under the braces for cleaning up both gluing surfaces. A flexible plastic tube attached to my vacuum gets the grit out of the joint afterward. You can improvise a lot of useful gluing/cleaning/scraping tools. This photo might give you some ideas. The long rubber-tipped dowel in the middle is great for pushing things into position through a soundhole, for example. You can never have enough reachers, pokers and pinchers! The joint is clean and it’s time for glue. This flexible spatula is a .004" feeler gauge cut to fit into the collet of my long-handled X-Acto knife. With a pool of Titebond on the masking, I use the spatula to pick up the glue and slide it under the wedged-up brace. I also use my curved sandpaper pieces for working glue under the brace. When the glue’s in, the wedges come out. It's time for a thorough cleanup. I put clamping pressure on the brace using a scissor jack. Adding pressure produces glue squeeze-out of course, and I clean it away as it appears. I had two scissor jacks on hand, and used them both to apply even pressure over the length of the gap. Outside the guitar, I added support for the clamping pressure by positioning a paper-covered slat of scrap wood across the back, held with two spool clamps. A mini cam clamp and another wood slat add support right above the repair. (This slat doesn't need a protective paper cover because it contacts the pickguard, not the guitar’s finish.) There’s the repair, held by the two scissor jacks. With the tape removed, You can see a little of glue squeezeout remaining — such a thin, even, line along the brace, that I didn't try to clean it away.Fixing loose braces in an acoustic guitar

You can't see it, but you can hear it.
The first step is to lay down a dropcloth to catch any mess:
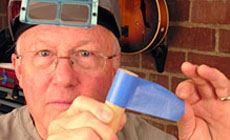
Gap-spreading wedges
Blades, strips and gluers
Outside support
Done deal!