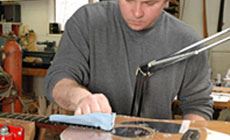
Using fret polishing wheels on a flex shaft
On a fret job, the last step is what your customer sees first!
Getting a mirror-like fret polish. Here’s how I finish the frets so they look and feel great, giving a good first impression when the player picks up the guitar!
After all the steps of a fret job are carefully done (installation, leveling, crowning...), it’s the last step, polishing, that customers focus on. When the frets are shiny and smooth, the first impression is “great fret job!”
When I do a fret level and dress, I use fret polishing wheels for the final step. Here’s the process I use to get results that make my customers happy:
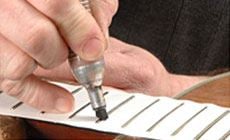
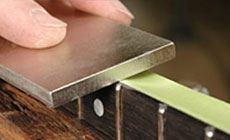
I use a black magic marker to color the tops of the frets. Leveling the frets scrapes the ink away, showing where the level is removing metal. Wherever ink remains, that’s a low spot. When the ink is coming off evenly, I can see that I'm getting good results.
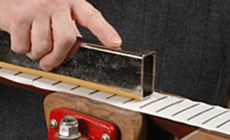
I like the 8" fret leveler. Afterward I ink the fret tops once more, and recrown them with diamond fret crowning files. This reduces the flat leveled area on each fret to a tiny sliver down the middle, with the rest of the fret top curving up to meet it. Nice rounded fret tops don’t just feel good, they make a precise point for string contact.
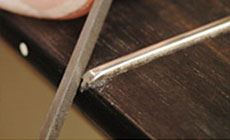
I carefully run a diamond leveler along the side of the fretboard to knock down any fret ends sticking out. Sometimes this problem is due to fretboard shrinkage. Watch out for it especially in dry winter months.
Next I come in with a fret end dressing file to create a smooth feel along the edge of the neck.
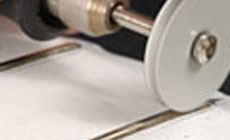
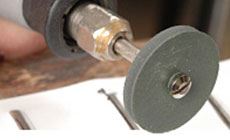
Here’s where the wheels come in: I finish up the fret dressing with ceramic polishing wheels in a flexible-shaft handpiece. I have a fine-grit polishing wheel in one Dremel flex-shaft, and an extra-fine mounted in another. Having two wheels ready to go makes the work go quickly. A Foredom handpiece also works great for these mandrel-mounted wheels.
Check It Out!
This is new:
I always protect the fretboard by carefully masking it. That’s always meant masking tape between every fret. But I’m trying something new here: a fretboard mask. It's adhesive, with slots to fit over every fret. This saved me a ton of taping time!
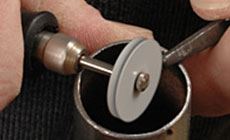
Shape the wheel first
Press the spinning wheel against the handle end of a file, and lightly shape the wheel's edge to roughly match the fret shape.
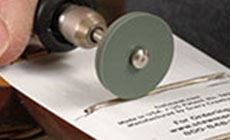
Polishing takes a delicate touch
Start at the first fret, using the fine wheel. Move from the bass side to the treble side of the fret in one pass. Don’t go back and forth, and don’t stop moving the wheel across the fretwire! These wheels are very fine, but at a high speed they’ll put a dip in your fret if you stay in one spot for any time. Keep moving!
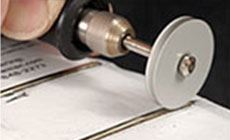
If you need more than two passes, let the fret cool down for a few seconds before continuing. If the frets are glued in, the heat of friction from repeatedly using the wheel could even cause the glue to release.
After making a pass or two from the bass to treble side, move to the other side of the neck and make one pass from treble to bass. This is to put a smooth round on the other end of the fret. It’s easiest and safest to move the wheel up onto the end of the fret this way rather than moving from the center out over the ends. You don’t want the wheel to to run off the end and down onto the side of the fingerboard.
Finish off with the extra-fine wheel and be cautious of generating too much heat. The fine wheel creates more friction than the coarser one.
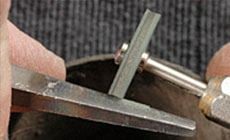
Eventually, the concave groove you put in the wheel will get to be too deep. At that point, the wheel could even mark the fretboard. When it seems a little deep to you, run the wheel against the side of a file tang to wear down the the edges, decreasing the depth of the groove.
Last step:
Clean the fretboard and give it a light coat of fretboard finishing oil, buffing the excess off with a cloth.
The shiny cover on the guitar is a dreadnought guitar template I’m using to protect the top while I work.
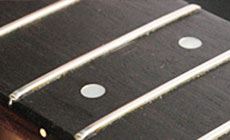
Here’s what we’re after: shiny frets ready to go to the customer!