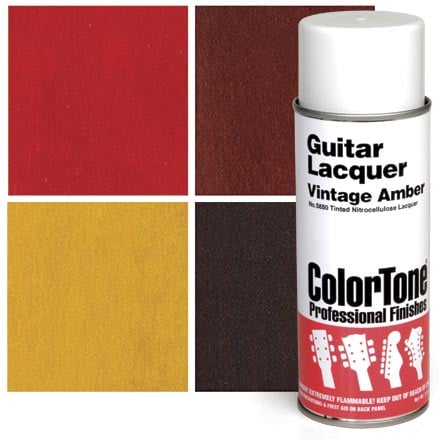
ColorTone Tinted Aerosol Guitar Lacquers
Application instructions and a finishing schedule for ColorTone Tinted Aerosol Guitar Lacquers.
ColorTone® Tinted Aerosols come in four transparent colors: Vintage Amber, Cherry Red, Red Mahogany, and Tobacco Brown. Combining these colors produces a wide range of tones, including sunbursts. Vintage Amber and Tobacco Brown will create a classic two-tone Fender sunburst. Add Red Mahogany for a vintage three-tone 'burst. Use Vintage Amber and Cherry Red for a Les Paul "cherryburst." These aerosol colors are a special formulation of nitrocellulose lacquer with transparent stain and solvent designed for lutherie work. Their intensity is suited for instrument finishing: they spray a carefully measured amount of color, so you can build tones and sunbursts in a controlled way. Apply these tinted lacquers to smooth bare wood, sanded base coats of paste wood filler, ColorTone Sanding Sealer, or ColorTone Wood Stains. ColorTone Tinted Aerosols require clear lacquer topcoats over them to build a protective coating and to obtain a full gloss finish. Do not use cold aerosol cans. For best atomization, gently warm the can to 90-95 degrees fahrenheit by standing them in a pan of hot tap water. Shake the can for at least one minute after the agitator ball rattles. Avoid spitting color. Most spitting occurs when starting or ending the spray stroke, so start the spray while pointing the nozzle away from the guitar. Move the spray onto the instrument, then off again before you release the nozzle. Make sure the surface to be colored is smooth and dust-free. Spray light coats, building gradually to your final color (each coat adds color). Allow 30 minutes between coats. Practice on scrap to find the color you're after, using the same wood as the instrument being finished. Hold the can 8-10 inches from the guitar, pointed squarely at the surface. Move at a uniform, moderate speed. Spraying from farther away gives a wider pattern and a more gradual build. Spraying too close or moving too slowly causes build-up, resulting in runs and sags. Compare your spray technique to a rainfall: a light even rain covers things nicely, while a heavy downpour causes run-off. Do not build wet coats. Allow 15-30 minutes between each coat for the solvent to evaporate before additional coats are applied. Do not sand the color coats. No matter how lightly you sand, sanding will make the color coats uneven. Wait until you've applied clear coats over the color before sanding. Wait overnight before clear coating. After you've achieved the desired color, let it dry overnight. Next, apply three light clear coats before doing any sanding. These first few coats of clear must be applied lightly because they will dissolve the color. If they're applied heavily they will run, pulling color with them. After three coats of clear lacquer have been applied, it is okay to apply heavier coats. Create custom colors by uniformly spraying one color over another. In the right proportion, Cherry Red sprayed over Vintage Amber mimics a Gretsch orange. On a mahogany guitar, Tobacco Brown over Red Mahogany is very much like the old Martin dreadnoughts. Experiment on scrap wood. A sunburst is built from the center of the instrument outward. For example, start with Vintage Amber in the center, then follow with the darker sunbursting color (Tobacco Brown for a two-tone, or Red Mahogany then Tobacco Brown for a three-tone 'burst). You can come up with other good approaches by experimenting, but this center-out technique is a proven method. Spray the center with enough coats of Amber to achieve the full intensity you want before you switch to the darker sunbursting colors Use light coats to get a soft blend where colors overlap. Clean the surface of imperfections, sanding to 220-grit. Use a grain filler on porous woods. Spray 3 coats (1 can) of ColorTone Clear Sanding Sealer. Steps 3 and 4 can be reversed, depending on the look you're after. Apply 3 coats for a single color. Also see "Sunbursting." Spray 4-10 coats (4 cans) of ColorTone clear gloss lacquer. Allow at least four hours between coats, and wait 24 hours before level-sanding. Allow the finish to cure 10-14 days. Wet sand with 800-grit and finer finishing papers, then buff to a high gloss.Application
Single colors
Sunbursting
Finishing schedule:
1. Wood preparation
2. Grain filling
3. Build a level surface
4. Color or sunburst
5. Clear coats
6. Wet sand and buff
