Wiring a humbucker to get two sounds
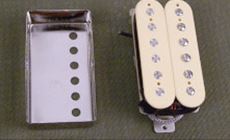
Switchable between single-and double-coil A customer emailed me looking for a Golden Age Humbucker that doesn't exist. He wanted to find these four things in one pickup: Items 1,2,3 on his wish list are no problem… we’ve got that in stock with our Parsons Street Humbuckers. But that last item means a custom modification, introducing a new wire at the connection between the humbucker's two pickup coils. Ever since Gibson created their famous PAF pickups in the late 50s, the two humbucker coils have been connected in series by soldering together the finish leads. That’s the way our Parsons Street is wired. By cutting this link and adding a wire, I turned a Parsons Street into the double-duty pickup this customer was after: switchable between one active coil or both (humbucking). The P-Street is the ideal starting point for this project, since its coils aren’t wax-potted. Just like the 1950s, the coils are simply wrapped with tape.
Coil surgery is delicate work. That series link is very thin wire. You'll need steady hands and pretty good soldering skills. And of course, you'd never want to mess with an actual vintage PAF this way; even removing the cover will have a negative impact on a valuable old 1950s pickup!
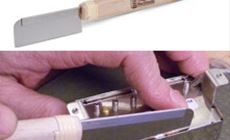
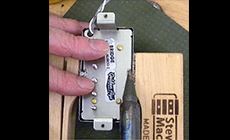
We recently started carrying this superfine saw, which I use to carefully cut through the soft solder holding the cover on. It makes a quick, clean cut. The solder remaining on the pickup frame and cover reflows when it's time to fasten the cover back on.
Keep the sawcuts straight up and down, so you don't dig into the coil. Once the solder has been cut through, the cover can be carefully removed.
Here's a Trade Secret that's all about how to open up a humbucker.
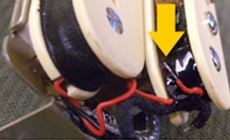
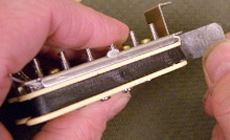
The series link connection was hidden under a few more wraps of paper tape, so I removed the screws holding in the adjustable coil so I could wiggle it out in order to remove and save the tape. Removing the paper coil tape revealed the solder joint for the series link. I carefully bent the joint away from the bobbin using care not to break the coil wire — which is so thin you can’t even see it here, but it’s soldered to the end of this red wire.
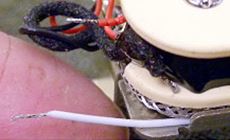
Next I added this white lead wire, which I'm going to solder to the red series link connection.
For this thin flexible lead, I pulled the white strand from our four-conductor lead wire. (Of course, you can use any color you like for this.)
I soldered this white access wire to the red series link connection, then taped off the joint. If you happen to break the lead wire while doing this, don't panic. It's not hard to re-attach the lead to the coil wire: follow the free instructions for our humbucker kit online.
I re-used the bobbin tape and screwed the coil back down to the baseplate.
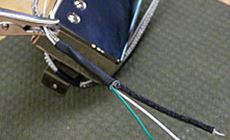
I ran the new white series link access wire out through the baseplate hole and ran it along the braided shield. I'll add short pieces of heat shrink tubing every few inches to keep the wires bundled together.
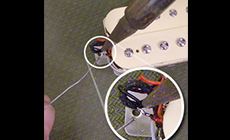
The sawed-through solder joint reflowed together nicely when heated with a 60 watt iron. A cam clamp holds the cover tightly together until the solder is completely cooled. This reduces strain on the hot joint and ensures that it will remain solid.
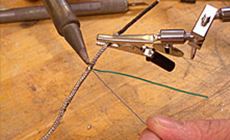
My final step is to attach a flying lead to the braided shield. This flexible wire will make it easier to solder to the switch. I used a piece of the green lead from our 4-conductor wire for this. A bit of heat shrink tubing at the end of the braided shield makes everything nice and tidy.
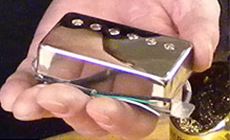
This started as a single conductor humbucker, but now it has the ability to cut a coil. That’s added versatility — without having to buy a new pickup!
It’s a simple matter to connect the green and white leads to your switch, which could be an on/on mini-toggle or a push-pull pot.


First step: open’er up

Now it gets delicate
Add a flexible ground lead
Here it is!