Upgrading the electronics in a "Less Paul"
Don’t have the bucks for a high-end Les Paul? Here’s how to get more out of a “Less Paul”
On StewMac’s tech support line, folks ask me how to soup-up inexpensive guitars. The question is, “How do I turn this budget guitar into a more serious player?
Looks good, feels good... Now it sounds good!
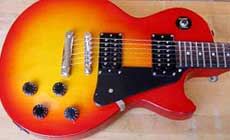
Here’s a budget-priced Les Paul copy. It’s shiny and new, and plays well, but the owner wants to modify it to make it more like a vintage Les Paul. My advice: the first dollar he spends should go toward what has the most effect on the tone. We decided to scoop out the insides: replacing the wiring and pickups.
Step 1: New wiring
Cheap pots and switches are common on low-price guitars, and we often see pickups that are way overwound. Usually they have ceramic bar magnets, and sound too thin and bright — without clarity and punch. They sure don't have the warm sound that this guy was looking for when he chose a Les Paul style guitar.
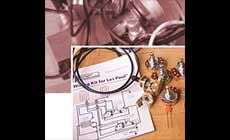
The first step was to rewire it with better components, using a Les Paul wiring kit.
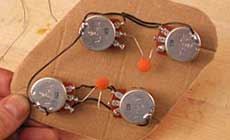
Here’s a really handy tip:
Cut a piece of cardboard in the shape of the control cavity, and poke holes for the control pots. Hold the pots this way while you work, and your pre-wired circuit will drop right in place! (It’s soooo much easier than trying to wire things up when they’re sunken down in the control cavity!)
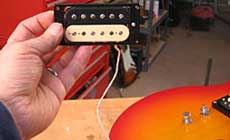
Step 2: New pickups
Once the controls were wired, I installed a set of StewMac Humbucker Pickups. These pickups are designed to match the original humbucker specs, including AWG42 coil wire and Alnico 5 magnets — they’ve got the vintage tone this customer’s looking for.
Before stringing up the guitar, I adjusted the pickup polepieces in the same way Gibson did back in the 50’s. (Thanks to Phil Jones for telling about this on page 116 of Dan Erlewine’s book, How To Make Your Electric Guitar Play Great!)
More people should know about Phil Jones. He’s an ace repairman in Nashville, and he’s worked on pretty much everything that ever had strings. We all can learn a lot from him!

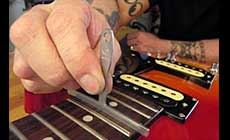
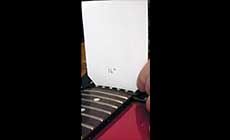
I used an understring radius gauge to find the radius of the fretboard...
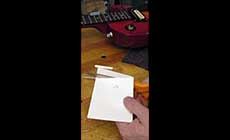
..then traced that radius in pencil onto an index card. I cut the card with a scissors to get a tiny, pickup-size radius gauge that fits right down on the polepieces.
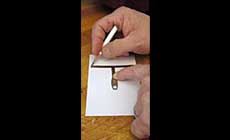
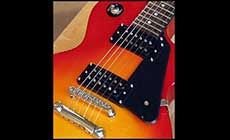
The idea is to drop the two outside polepieces down until they’re flush with the surface of the pickup, then adjust the four poles in between to follow the fretboard radius.
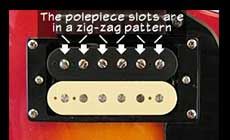
Phil Jones says:
“When you raise the middle polepieces to a 12” radius, you end up with screw slots in an almost perfect zig-zag pattern from side to side.”
He’s right: that’s what I got. After doing this to both pickups, you can string the guitar up and set the action (string height).
Here’s how to set the pickup height:
String up the guitar, and press the low and high E strings down onto the last fret (nearest the pickups). Measure between the bottom of the E strings and the polepieces. Adjust the neck pickup for a 1/16" gap; set the bridge pickup to 3/32". You might alter it a little depending the technique of the player.
That’s all it takes.
This guitar sounds way better now, with only a little investment. Just for fun, we might do some more upgrades to this Les Paul clone. If we do, we’ll tell you about it in a future Trade Secrets!


