E-Model Megaswitch Instructions
Installation and wiring schematics for the E-Model Megaswitch.
The E-model Megaswitch brings out five versatile sounds from combinations of single-coil pickups or humbuckers. It replaces a standard 5-way Strat®-style switch, for new wiring options plus coil-tapping, and lets the guitarist combine pickup coils for hum elimination.
Before installing the E-model Megaswitch
Determine the polarity of each pickup coil, and which wires are connected to each coil:
Similar magnet poles repel each other, and opposite poles attract. For a humbucking effect, two coils with opposite polarity must be connected either in parallel or in serial mode. Take the pickup that you want to use in the middle position, and place its top side against the top side of another pickup coil. If their magnet polepieces attract each other, they have opposite polarity. Or you can use the #5127 Polarity Tester to do this without removing the pickups.
To identify the wires leading to each coil of a humbucker, connect the wires to a multimeter (set to 200mV) and slightly touch the polepieces of each coil with an iron-bearing object (a screwdriver or allen wrench). If you get a swing on the multimeter, you have identified that coil’s leads.
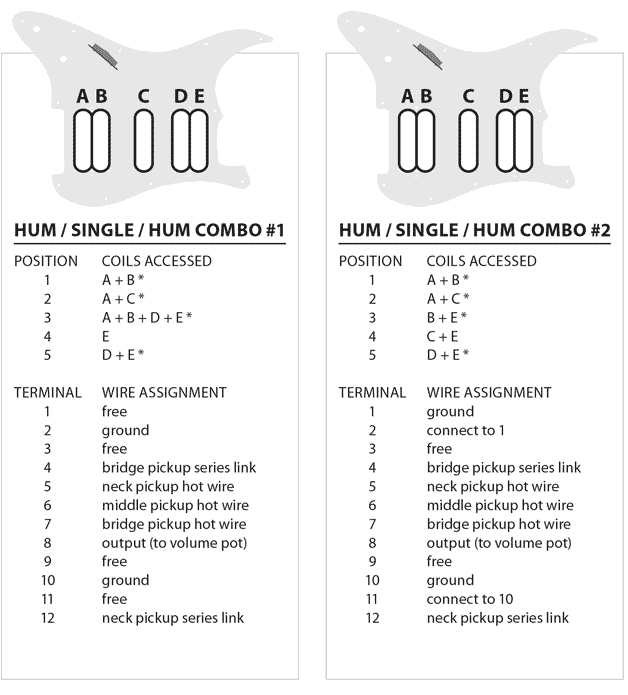
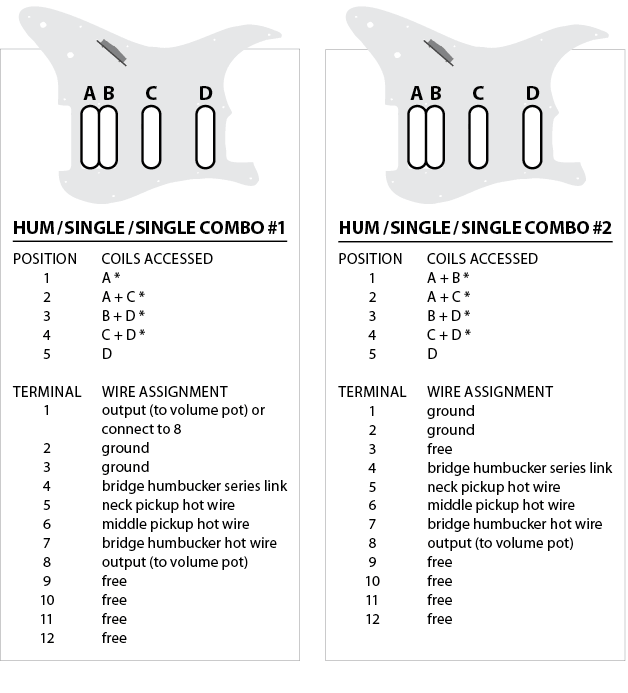
When you have finished analyzing and soldering the pickups, certain sounds may be “thin,” or out of phase. In this case, exchange the hot wire of the affected humbucker with its ground connection; the shield wire remains grounded. If the correct coils are connected but the sound is still too thin, change the 4-conductor wiring of the affected humbucker as follows: Solder the hot and ground wires together as a new coil-tap. Use the former coil-tap wires as the new hot and ground. Recheck the assignment of the wires to the coils, and connect them according to the wiring schematics in the following pages.
E-model Megaswitch tone control wiring tips
When installing the E-model Megaswitch, you often must rewire the tone circuit. If the instrument will have a single or master tone control, wire the volume and tone pots as shown below.
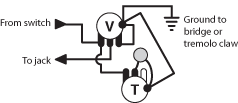
Strat-style installations which have two tone controls, one for the neck pickup and the other for the middle pickup, should be wired as shown below.

Because the E-model Megaswitch doesn’t allow the middle pickup to be used by itself, you may want a tone control for the neck and bridge pickups. To do this, wire the lower tone pot’s lead to lug 7 instead of lug 1.
Both set-ups have their advantages. A middle tone control only affects the “2” and “4” (the “Strat out of phase”) positions. A bridge position tone control affects three of the five switch positions: bridge pickup only; bridge and middle pickups; and bridge and neck pickups.
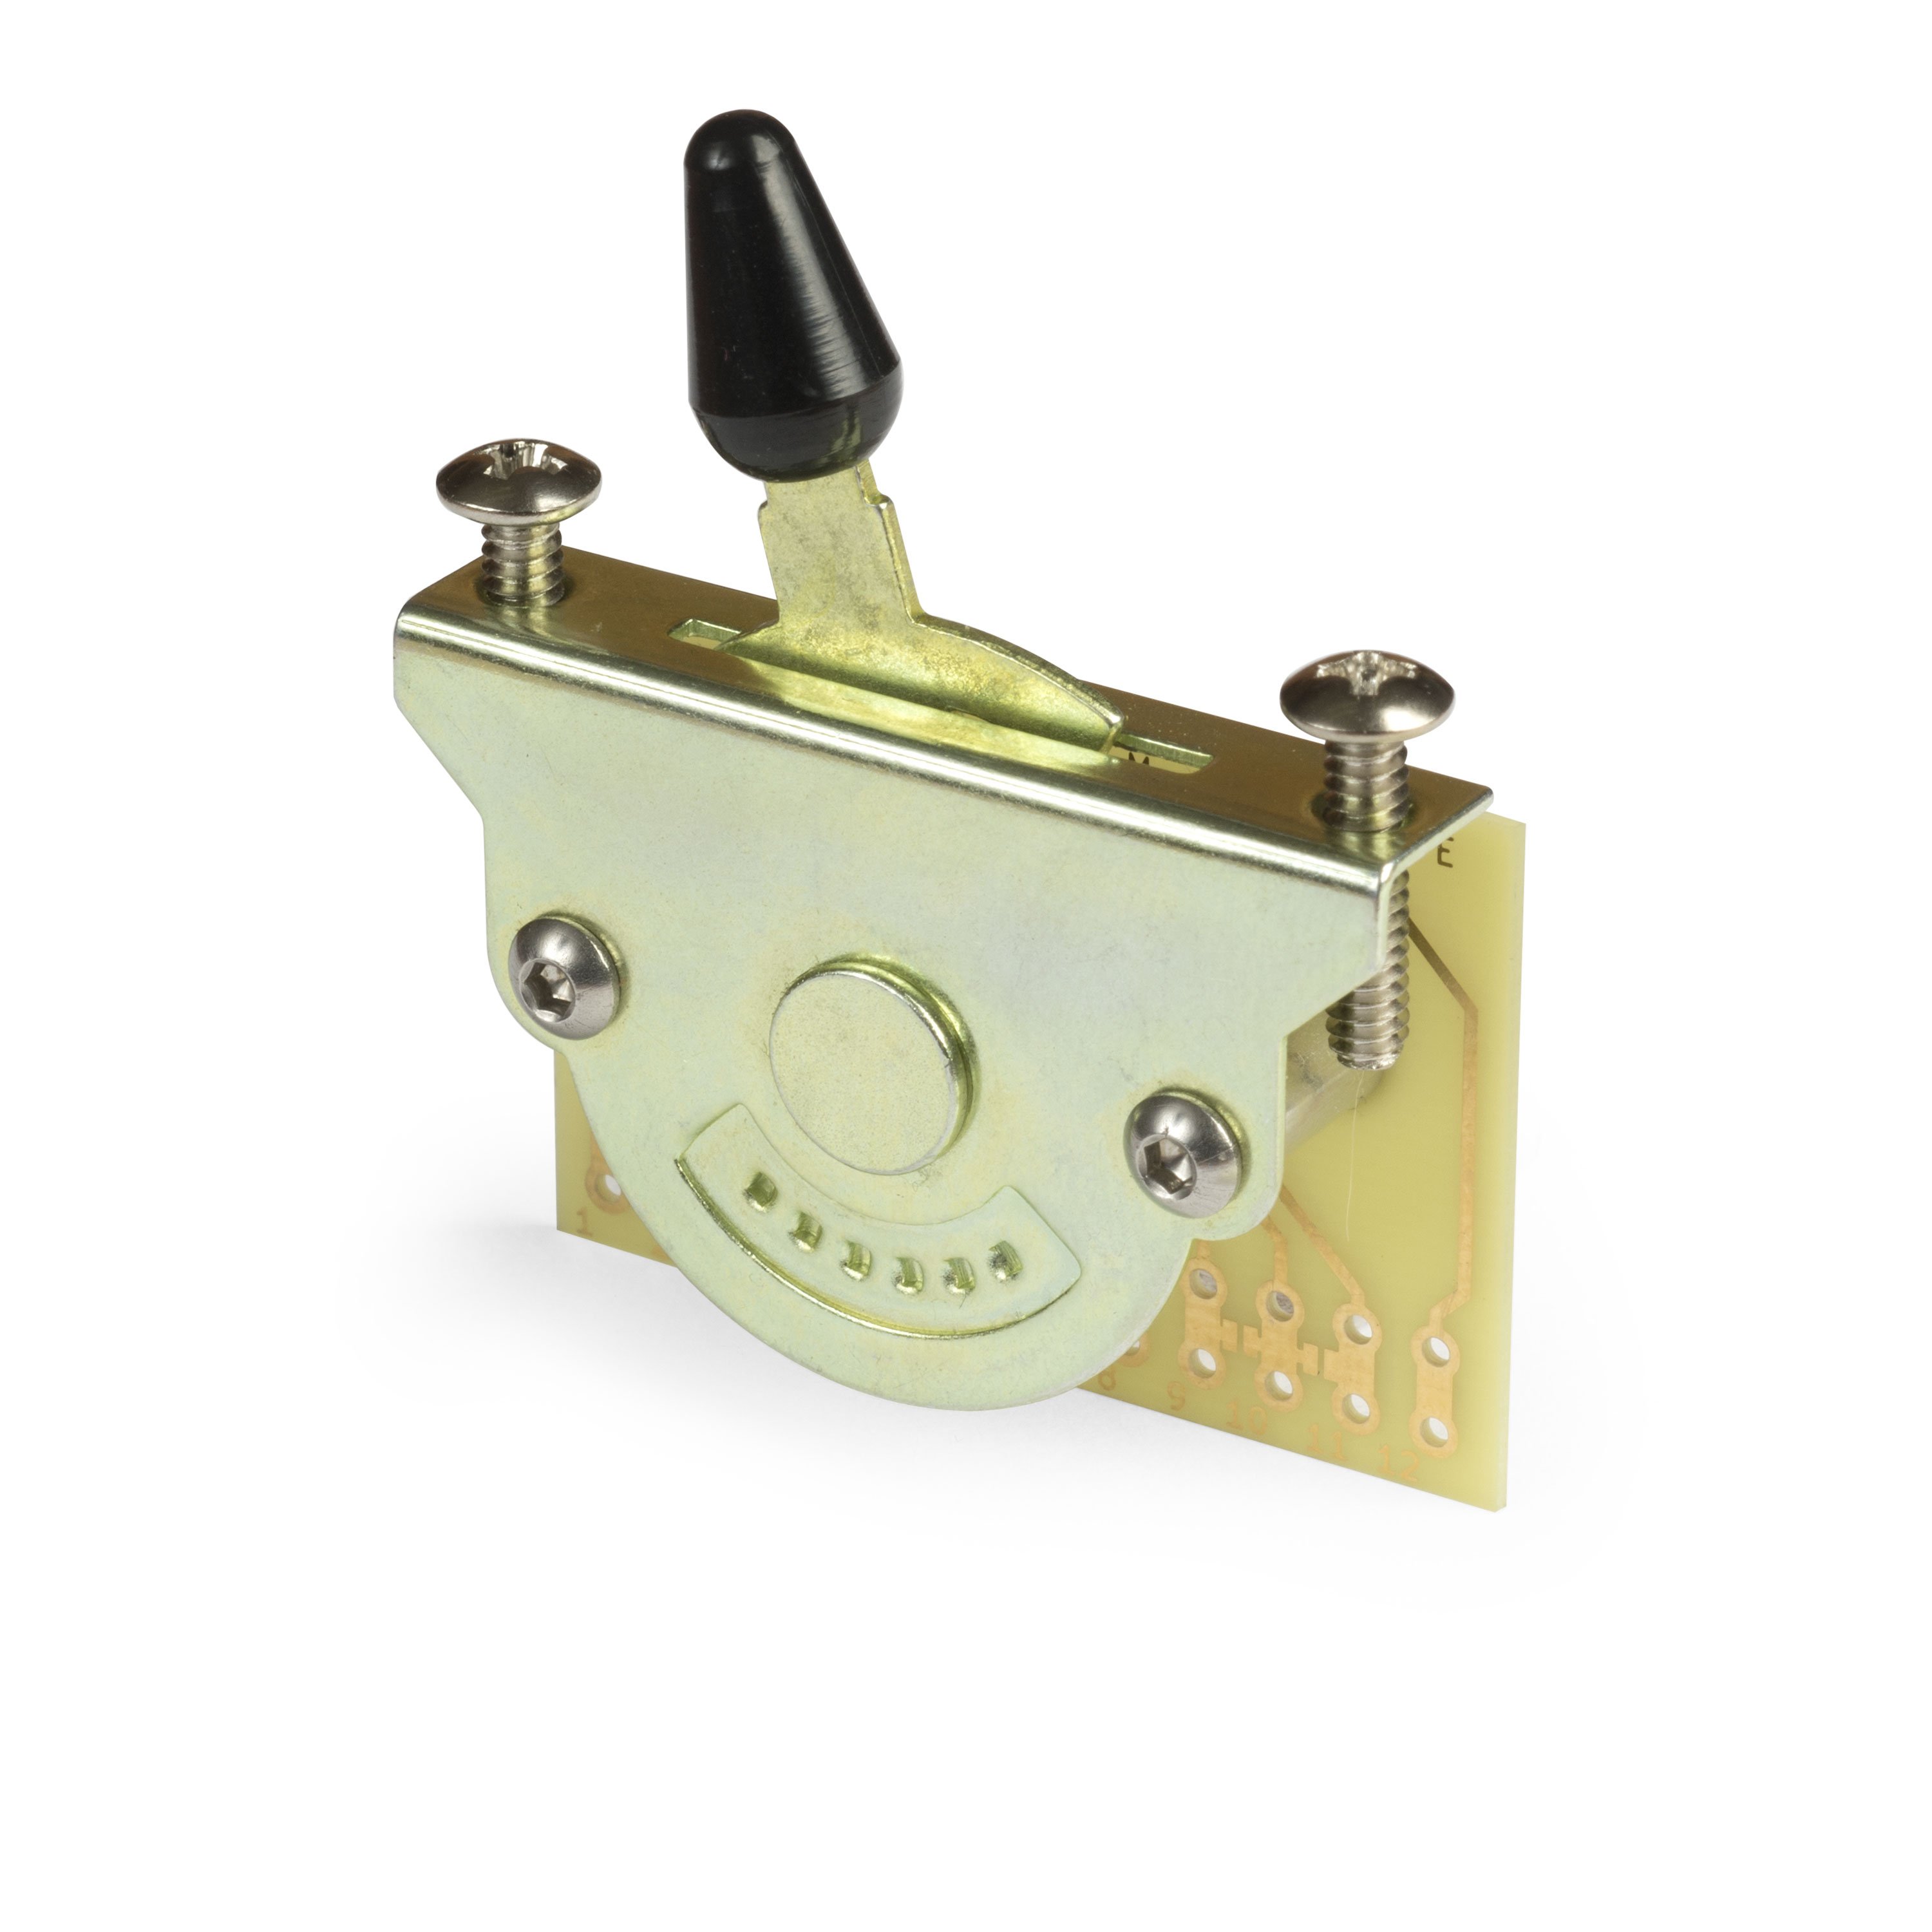
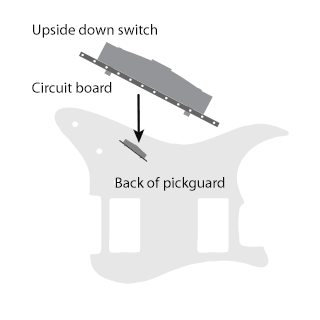
From the underside of the pickguard, install the switch with the circuit board toward the center of the guitar. Always mount the Megaswitch with the printed circuit board closest to the pickups and control pots. Insert the wires from the non-printed side of the plate, and solder from the printed side.
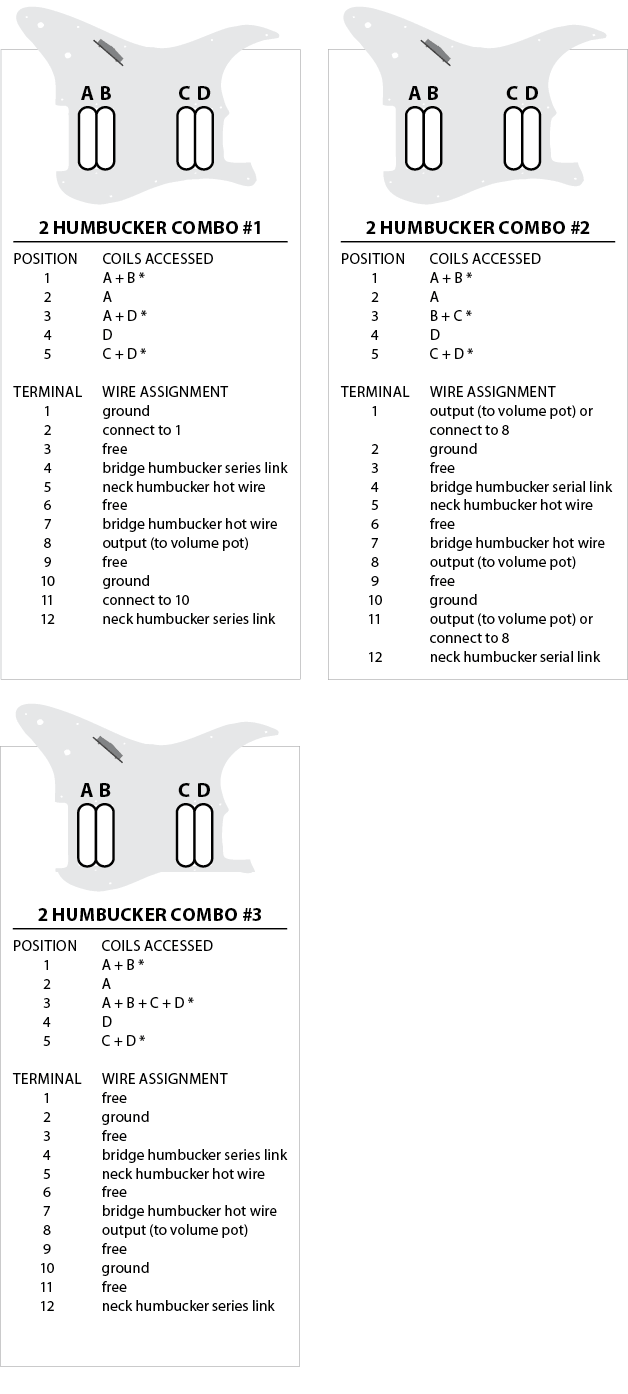
2 HUMBUCKER COMBOS
HUM / SINGLE / HUM COMBOS
HUM / SINGLE / SINGLE COMBOS
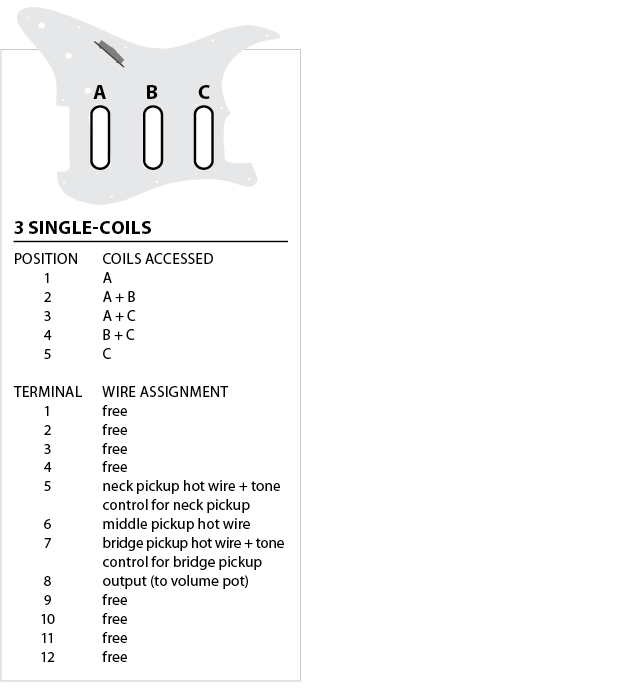
3 SINGLE-COIL COMBO
