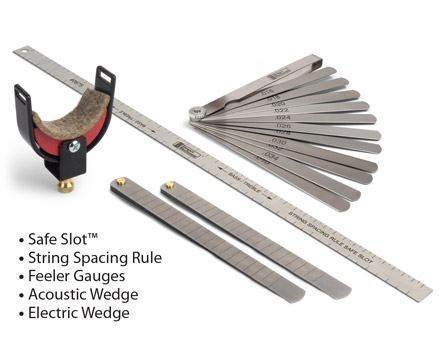
Safe Slot Nut Guard Instructions
For making professional quality string nuts
Making a nut and filing the string slots is very challenging. With just a file stroke or two it’s easy to cut a slot too deep, and when that happens you have to throw out the nut and start over. The Safe Slot™ prevents this waste and frustration.
Shaping: Determines the perfect nut shape to fit your string gauges and playing action.
Slotting: Protects critical slot depths by stopping you from accidentally filing too deep.
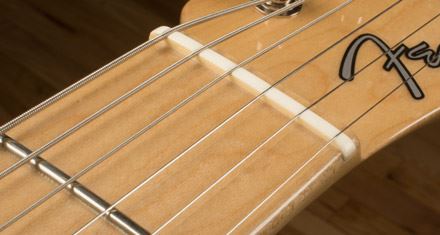
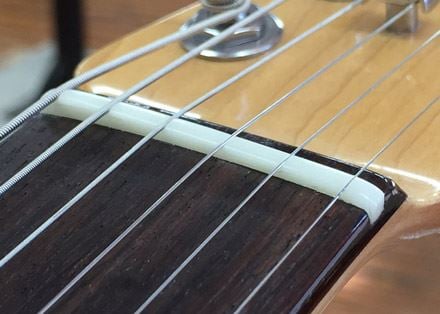
Details of a well-made string nut
- Bottoms of the string slots are higher on the bass side, lower on the treble side.
- Correct slot depths create desired string action over the frets on all six strings.
- Slot walls are no deeper than necessary to secure the strings without pinching them.
- Shape of the nut slopes from higher on the bass side to lower on the treble side.
- Nut is smoothly shaped and comfortable.
- Surface is polished to a shine.

Instructions
Follow these steps to make an accurate new nut out of any nut blank material you like. In our example, we’re using unbleached bone.
Evaluate your frets. Your frets are the foundation of a good setup, so if they’re worn out or uneven you’ll need to fix them first. You can’t get the full benefit of a new nut with bad frets.
High or low action? Adjust the truss rod so the neck is straight, or so it has the amount of relief (slight upbow) you prefer. Place a capo at the first fret, and set the height of the bridge so the string height is where you like it.
Nut dimensions are affected by your preferred string height. These numbers vary, depending on the player. If you don’t know your favorite string heights, try these standard specs used by Fender, Gibson and Martin in the chart at right.
In these instructions, our example uses a set of 10-46 strings. We’ve chosen to use these string heights over the first fret: .020" at the bass E and .010" at the treble E.
Fit the new nut. Remove the old string nut and fit the new nut blank into the slot.
Position the outer E strings. Tighten the bass and treble E strings—not to pitch, but with enough tension to stay put while you position them. Set the E-to-E string string spread as you like it, and use a sharp pencil to mark their locations.
Hold your String Spacing Rule up to your E-to-E marks to find your string spacing and transfer these marks to the rule so you can retrieve them later. See the separate String Spacing Rule instructions for details on proportional string spacing.
Measure the full width of the nut in the nut slot and make a note of it. In our example, we found the nut width to be 1.690".
Measure the fret height. Lay your straightedge on the frets, touching the front of the nut. Measure the height of the frets by inserting feeler gauges under the straightedge, touching the face of the nut. You may need to stack more than one feeler gauge to find the height. Take this measurement at each string position; if the height varies, use the tallest measurement.
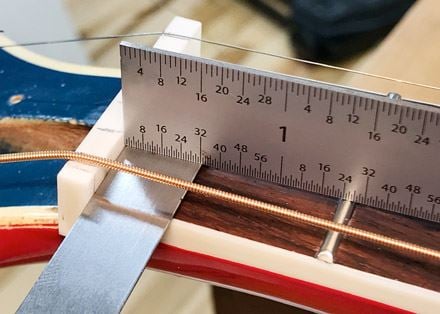
In our example, we found a height of .050" by stacking the .034" and .016" feeler gauges.
Use the Safe Slot to mark the height. Insert the feeler gauges into the Safe Slot and clamp it in place. Note that the padded cradle is angled: position the lower side toward the peghead. Tighten the cradle just enough to hold the feeler gauges flat against the fingerboard: over-tightening will make them bow upward. With a pencil, strike a line across the face of the nut.
Determine the height of the new nut. Add three numbers to determine the height of the nut: the fret height, your preferred action at the first fret and half the diameter of the string (for electric guitars). For acoustic guitars, use three-quarters of the string diameter; some electric players prefer a deeper slot like this, too.
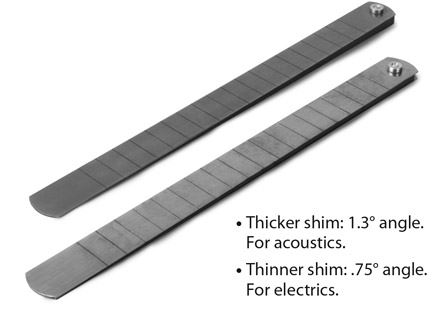
Select the tapered shim. The tapered shim sets the slope of the top of the nut—from higher on the bass side to lower on the treble side. The thinner shim (0.75° angle) is for electric guitars, the thicker shim (1.3° angle) is for acoustics. The 1.3-degree shim may be used on electrics that use some heavier gauge heavy/light sets, designed for drop tuning or lower tunings.
The markings on the shims are not measurements, they’re just a helpful visual reference for positioning the shim.
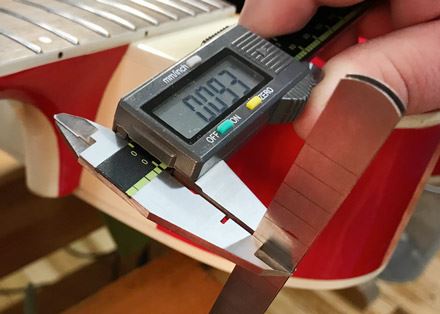
Using calipers, find the point on the shim where its thickness matches your nut height on the bass side (.093" in our example). Mark this point on the shim with a pencil.
From that mark, measure your nut width and make a second mark to indicate the treble side location (1.690" in our example). Measure the thickness of the shim at this point to compare it with your calculated treble-side nut height. If this shim location is lower by more than .005", shift your treble side mark on the shim so that the treble side is not too shallow—then move your bass-side mark to indicate the nut width (1.690" in our example). It’s better to start on the high side; you can always remove material, but you can’t put it back.
Place the shim in the Safe Slot and line up your nut width marks on the shim with the edges of the nut. Tighten the Safe Slot to hold the shim against the nut (again, do not over-tighten). Strike a line on the nut.
Shape the top of the nut. Use a file or a belt sander to lower the top of the nut to the top of your pencil line. Leave the line showing, so you have a little extra to work with as you cut the nut slots. After the slots have been cut, you’ll bring the top of the nut down enough to remove this pencil line.
The nut is now shaped to fit your preferred action and string gauges. You’re ready to cut the string slots.
Mark the string locations. Use the E-to-E marks you made on your String Spacing Rule to reestablish your bass and treble E strings. Place the rule, with the the tapered shim under it, in the Safe Slot. Slide the shim so the rule is even with the top of the nut, and mark all six string locations with a sharp pencil.
Calculate the slot depth. This measurement is the fret height plus your desired action over the first fret. It's wise to stay on the high side, because you can always lower the slots if you need to. The perfect slot depth is a matter of preference, taking into account your playing style and string gauge.
On our example, the two E string slots are .070" (bass side) and .060" (treble side). We’re using these numbers for the four outermost strings. For the two middle strings, we’re using a slot depth midway between these measurements:
E and A strings: .070" (using .030" + .040" feeler gauges)
G and D strings: .064" (using .034" + .030" feeler gauges)
B and E strings: .060" (using .034" + .026" feeler gauges)
On our example neck, which is dead straight, these measurements will give us twelfth fret action of .065" on the bass side and .050" on the treble side.
Put feeler gauges in the Safe Slot. Load gauges equaling your slot depth into the Safe Slot and clamp them against the nut (don’t over-tighten).
Start with a .010" cut. Begin cutting your slot with a .010" nut slotting file or gauged saw, keeping it centered on the pencil mark. Just make a couple of strokes to begin your slot. This small notch will help your larger nut files stay on center.
Start with the bass strings and work toward the treble side, changing feeler gauges to match the slot depths. When your file or saw reaches the feeler gauge, stop and you can move on to the next slot.
Sand or file the top of the nut to remove the pencil line drawn with the tapered shim. This lowers the top of the nut to approximately its final height, with a just enough extra left for final-shaping and polishing.
Check your setup. Check the action at the 12th fret, and adjust the bridge height if needed. Check the action at the first fret. If needed, you can bring the slots down a few thousandths at a time by stacking different feeler gauges in the Safe Slot.
Recheck your 12th fret action. You might need to adjust the bridge again or very carefully deepen the nut slots as you dial in your setup. When you’re happy with your nut and 12th fret action, do the final shaping on the top and ends of the nut. Polish the nut and install it.