Plastic nuts are high-speed and low-cost!
Dan Erlewine using a plastic nut? No way!
Yes, way! And sometimes I use plastic saddles too! Nobody preaches about quality bone nuts more than me, but sometimes the job calls for plastic. Plastic nuts are for high-speed, affordable repairs.
A new nut in less than 30 minutes?
“Time is money.” I got my start in repair work at a music store, and as a lot of you know, that means working fast and keeping prices low. I always have plastic nuts and saddles on hand for fast fixes on inexpensive guitars.
How fast can a new plastic nut be installed? Let’s play “Beat the Clock” to find out. I’ve got my tools ready, but we’ll need a timer... Hey, this is the wrong kind of timer! My 30 minutes starts now! I’d better hustle!
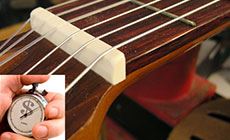
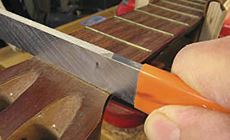
There’s no saving this guitar’s nut. It’s gotta go.
It took five seconds to figure that out...

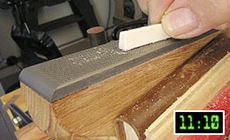
I gently cut the lacquer all around the nut.
Less than a minute so far...
I knocked the nut loose with a metal block and a hammer tap. It popped out easily.
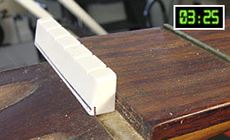
It took me another minute to clean and level the nut slot with a nut seating file.
About 2-1/2 minutes so far...

Next step:
Mark up the new nut, showing where material needs to be removed so the nut will drop into the slot.
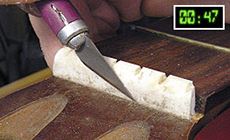
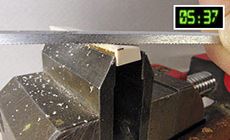
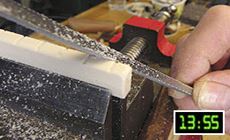
The unwanted plastic comes off quickly using coarse and smooth shaping files. (Don’t use a belt sander for this; the heat will warp the plastic.) A nut and saddle vise is my third hand for this operation.
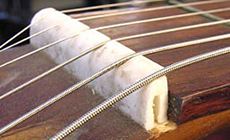
The trimmed-down nut dropped right into the slot. Installing the two outside E-strings showed that the nut is far too tall.

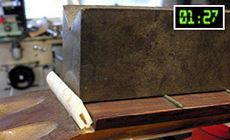
To lower the nut, I removed material from the bottom by sliding it on a 6" fingerboard leveling file — it cuts clean, and it’s fast.
A little over 10 minutes so far...
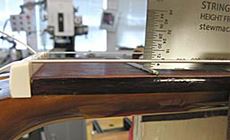
Whether plastic or bone, I always remove all sharp edges with a nut shaping file followed by 400-grit Gold Fre-Cut sandpaper. Don’t forget the very front edge of the nut. There's no reason to leave it sharp, especially on the corners.
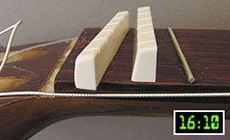
The finished nut is ready to install with #20 super glue (medium viscosity). On the right is an untouched plastic nut to emphasize the rounding and shaping done on the finished nut. The two E strings will hold the nut in position while the super glue sets (60 seconds).
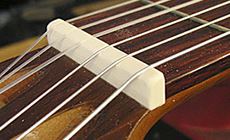
Strings installed!
Stop the clock!

OK, that was just over twenty minutes of high-speed work. If I were charging a customer for this job, let’s see how it would add up:
| Labor | $25.00 | My costs: | |
| Parts & Supplies | 1 Nut at | $3.50 | .40¢ ($3.10 profit) |
| Strings at | $8.00 | $4.98 ($3.02 profit) | |
| Glue, sandpaper, polish | $3.00 | $1.00 ($2.00 profit) | |
| Total parts & labor | $39.50 | ||
So, in less than a half hour, I earned $25 and made a profit of $8.12 on parts sold. That feels good. I love it when I have six or eight of these small jobs all on the same day. They usually require the same tools and bench setups, so I can work through them fast.
Other work done on this guitar included cleaning up the tuners, super-gluing loose frets, leveling the frets, and applying fingerboard oil. It looked and played a whole lot better after just 90 minutes of attention!


