How to fit a preshaped nut on a guitar
Issue 178 November 22, 2012
Tips for fitting a shaped and slotted nut. Dan Erlewine tries a preshaped nut in his own Fender Strat: it's so easy "it's almost like cheating!"
- Sanding the nut bottom radius.
- Balancing the bridge saddles with the nut.
- Thickness-sanding the nut.
- Final shaping/buffing: tapes that protect the finish.
- Using shellac instead of glue.
Video Transcription
Dan Erlewine: Bone. It's a very hard material and it shapes real slowly. So does ivory, bone is harder. Ivory is gorgeous and it was traditional. Martin used ivory, Gibson used bone and that's why for me to use TUSQ on this strat for my own guitar was something new.
TUSQ Nuts
I'm going to use an off the shelf, TUSQ Nut that's already cut with string slots and looks like this. It has a nub on the bottom so you can use it on a replacement neck that has a flat nut slot or on a vintage style that has the curve slot like this one does.
Sanding the nut bottom radius
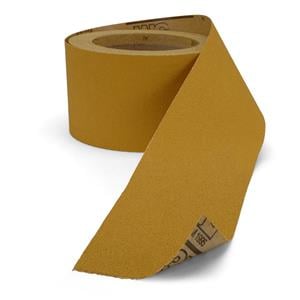
To use it, I'll need to remove that with a file. This is 80 grit and 120 grit Double Stick Gold Sandpaper stuck right to the fretboard. And that'll give me the really true radius of this fretboard and a jiffy. I'm down here trying to fit it. It fits in there. Man, I couldn't have got a better fit if I made this from scratch. I even like the spacing. So I'm happy with this.
If you replace a lot of the man-made nuts, Corian, Micarta, with TUSQ, it's going to sound better. If you replace it with bone, it's going to sound better. TUSQ is the closest thing to bone that I found that's man-made. Now let's get six strings on it and see if it buzzes.
Speaker 2: Let me see,
Balancing the bridge saddles with the nut
Dan Erlewine: [Dan strings up the guitar] Go, man, go. That's low up here on the low E string I have like 70 thousands. The radius is off down at this end. That's what I have to do now is adjust the saddles a little bit. I'd want to be able to pull that radius gauge up and touch the outside strings and touch the middle and the middles are too low. So I'm going to start raising those up, but not at pitch. You can lower them under tension, but I don't like to raise them. And generally even to lower them, I'll often slack it a bit just to keep all the wear off that teeny little bit of screw thread that's in this stamped piece of metal. That's darn close to being perfect right there [Dan measures the radius at the bridge using a Radius Gauge]. I just sort of lucked out.
So you have to set the radius at the bridge to correctly get it at the nut end. It's a balancing act, nut, bridge, nut. You kind of do them together.
Thickness-sanding the nut
I'm a little tall all the way across. That makes me happy because now I can lower them. If I had to rush out the door and play this thing right now, I probably could make it through the night. There's a little gap underneath the nut. The nut could be a little too thick and not dropping down all the way. So I'll take a little thickness off and might as well clean up the radius too, because it could be the center that's holding it up. I want to be able to push this thing down into the slot and see it made it to the bottom. Now that I've got a good fit, I'm going to knock those sharp edges off and to protect the finish. I'm masking off.
Final shaping and buffing: Protect the finish
If you work on the nut, when it's in the guitar, if it's in the neck, you should tape off around it. Otherwise, you're bound to slip with the file and you're going to cut into the wood. I use drafting tape on this and on almost all finishes. It's really low tack. I'll put the drafting tape down first and then get on top of that with a heavier tape to protect it from the files. What I'm doing here is just rounding off those sharp edges. The motion is a lot like rounding a flat. I worked my way up through the grits. This is 800 grit gold. Getting those little fine scratches out and then I'm buffing it with medium compound out of the tub and all the rough sharp edges are gone and it's buffed on the ends and buffed across the top and it feels good and looks good. This is almost like cheating and I'm going to string it back up.
Installing the nut using shellac instead of glue
You don't need a lot of glue to hold a nut in and in fact, I'm just using shellac here. It'll come apart easier if I want to take it out later. I can take that pre-slotted, TUSQ blank and have it in this guitar in less than a half an hour. Off the shelf nut-making with TUSQ.