Removing the glued-in saddle on a 1937 Martin D-28 Herringbone
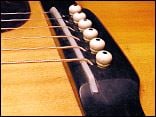
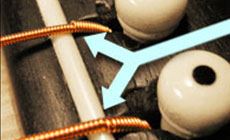
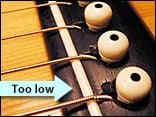
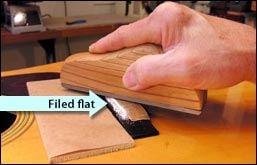
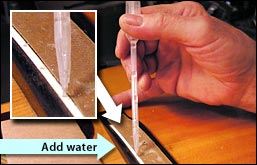
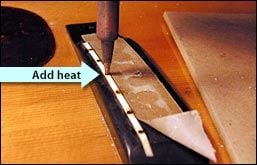
This 1937 Martin saddle is way too low. And it’s glued in tight, so replacing it is going to be tricky.. This bridge saddle is so low that the string windings are riding right up onto it. They’ll chew up the saddle and cause poor intonation. Somebody shaved this saddle down to lower the action. The proper fix would have been to leave the saddle alone and instead remove the neck and reset it at a steeper angle that works with the original saddle height. That’s my plan for this Martin D-28, but for now let’s focus on removing and replacing the saddle. This saddle is fastened with hide glue. Glued-in saddles are difficult enough to remove even when you can get a good grip on them with fret pullers, but this one was extra trouble because its rounded top was barely peeking over the top of the bridge. There’s nothing to grab onto! I started by using a coarse fingerboard leveler to flatten the top of the saddle. This allowed me to drill small holes right down through the top of the saddle — stopping when the drill bit had passed through the bone and hit the ebony in the bottom of the saddle slot. 1. Using a pipette, I dripped small amounts of hot water into the holes to soften the hide glue below. 2. The holes also provide a place for a pointed-tip soldering iron to center on as I apply heat across the saddle. This steams the glue loose under and around the saddle. 3. I pry the saddle upward with a small micro-chisel, its width thinned on a belt sander so it’s slightly narrower than the walls of the saddle slot. The saddle breaks at each hole — making it unnecessary to pry out the entire saddle at once. It pops out, a piece at a time. When string windings are pulling up onto the saddle, another possible trouble is a worn bridge pad. Over the years the ball ends of the strings can chew into the wood under the bridge, moving ever upward. This used to mean replacing the bridge pad, but now there’s a better solution: the BridgeSaver cleanly installs a plug of new wood under each bridge pin, leaving the original pad in place! Over the years I’ve become adept at thicknessing saddles by hand on a belt sander, but these days I prefer the accuracy of the Luthier's Friend Sanding Station. A strip of wood holds the bone saddle up toward the middle of the sanding drum while I push the saddle blank through. The new saddle is a perfect press fit. I trace the shape of the bridge top onto the bone, then draw my saddle height using a 20" radius gauge. This is the line I’ll follow to shape the saddle on my belt sander. Ready for final shaping and polishing!These string windings aren’t supposed to be up here on the saddle!
Too low
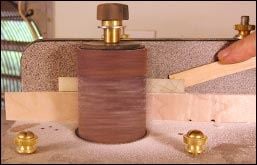
Here's how I got it out:
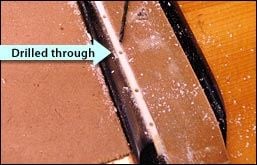
These holes serve three purposes:

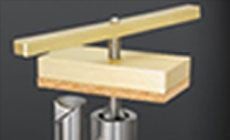
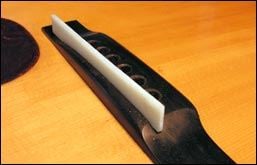
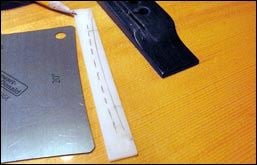
Making the replacement saddle: