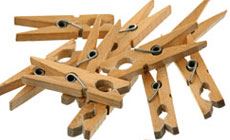
You need a bag of clothespins for your workshop!
Handy-dandy clamps! You need a bag of clothespins in your shop. Here’s why
Today I used clothespins as kerfing clamps, and I was reminded of how many uses they have. I’m even using them as Christmas presents...
Clothespins make great mini-clamps.
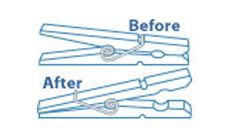
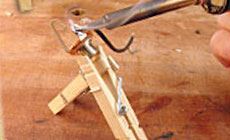
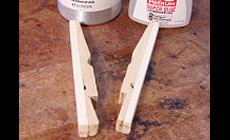
Here are some of the ways I modify wood clothespins for use in my shop: Turn the spring around backwards, and the wooden jaws become tapered, light-duty clamps. They can hold parts when I’m soldering (first photo), or keep binding strips together when I’m about to glue them (second photo).
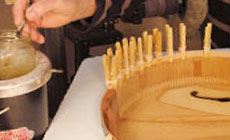
Today, I turned clothespins into kerfing clamps...
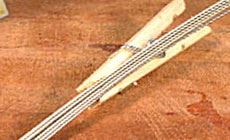
...for gluing new kerfed lining on an old Gibson archtop about to receive a new back. I customized this batch so they’ll grip kerfing tightly and they’ll last for years.
They were easy to make, and I had fun doing it.
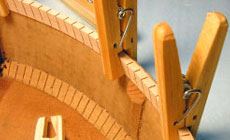
I cut an angle into the jaws so they’d match the shape of kerfing. This meant cutting away some wood: the penciled area on the pin at left shows what had to be removed. One side got an angled cut to match the kerfing (roughly a 13° angle). The other side was just pared down to the depth of the curve that already existed in the jaw.
I used a gauged saw and a chisel to cut these jaws into shape. I enjoy just sitting at my bench, working with hand tools for little jobs like this. It’s relaxing.
Back to my clothespin clamp:
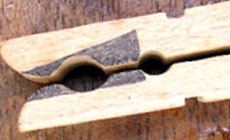
Testing the first one I made, I found that the clothespin spring didn't have enough clamping strength. For more oomph, I wrapped the clamp with a rubber band. But the added pressure caused the wood to break at the thin point created by my angled cut. Shoot! Too much wood had been removed. Hmmm...
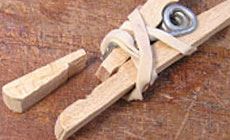
I glued a reinforcing strip of wood on the backs of the wooden pieces using #20 super glue, zapping them with accelerator. Then I sanded the pieces smooth.This reinforcement did the trick: They’re strong enough to stand up to the added pressure of a rubber band.
Mass-production time!
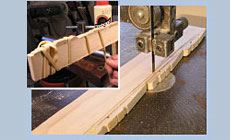
With Titebond, I glued several pieces to the edge of a pine board. Rubber binding bands held them together until the glue dried.
After an hour of dry-time, I bandsawed the wood so each of the clothespin pieces came away with a strip of the supporting wood attached. I smoothed this long strip of clothespin halves on the belt sander, then did my jaw-shaping before cutting them all apart into separate pieces.
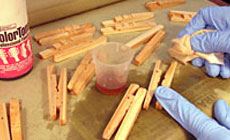
Why not put a finish on them?
These are really useful, and I know a luthier who would be happy to have a set. I made a double-batch so I can give the extras as a Christmas present. I wanted them to look nice, so I wiped the pieces with fretboard finishing oil. It dried in an hour, leaving a good-looking sheen. Hey, this is practical too: the finish will make it easier to clean glue from clamps.
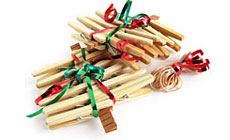
Ho Ho Ho!
I think a couple bundles of these kerfing clamps will make a nice present!
Check It Out!
I've said it before: I'm a hot glue fan
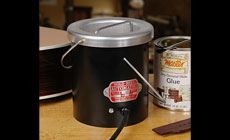
I like to use hot hide glue for gluing kerfing. But it does set up fast, so I need to move quickly. I’ve got maybe two minutes to get everything clamped up before the glue gels. To gain a little more clamping time, I warm the basswood kerfing on an oil-filled space heater. Keeping an eye on a surface thermometer, I get the wood as close to 100° as I can. I also turn the heat up in my shop when using hot glue.
The glue itself is warmed in a small jar that’s suspended in heated water in my electric glue pot.


