F5 Mandolin Kit Assembly
Assembly instructions, recommended tools and supplies.
Please read this brief assembly overview before beginning your work. We recommend that you follow the steps as listed, and consult our full-size blueprint. Take your time—the care you take in building will be repaid in the quality of your finished mandolin! We recommend our How to Build a Carved-Top Mandolin DVD. Other recommended resources include our Fret Work Step-By-Step and Guitar Finishing Step-By-Step books. Be safe when using tools, glues, and chemicals. Wear eye protection and gloves when needed, and always use proper ventilation. Please make sure you have all these parts before assembling your kit. It's important to completely rehearse all fitting and clamping before applying glue or finish. The following tools and supplies are recommended to assemble your kit. Most of these tools are standard woodworking items, though a few specialty tools are also shown. Where applicable, Stewart-MacDonald item numbers are listed. With the sides held in shape by the supplied body form (and with rubber bands on the F5 rim), glue the kerfed linings into position. Be sure the top edges of the linings are level with, or slightly above, the edges of the sides. After the glue dries, level the lining/sides so that the gluing surfaces are flat. The rubber bands must be removed from the F5 rim for this, but replace them after sanding. Leave the body form in place. Use coarse sandpaper and a sanding block that's long enough to span the rim assembly. Graduate the carved mandolin top to final contour and thickness, using sandpaper, finger planes, chisels or scrapers. There is no one "correct" method or "best" dimensions, although we recommend the blueprint specifications. The edges are the correct thickness for the bindings, and there is ample top wood for graduating. Shape the tone bars and glue them onto the inside of the top. Shape the ends and contour the bars to the final dimensions. Cut out the F-holes with a drill, a Dremel tool, and/or a coping saw. Graduate the carved back to the final contour and thickness as described above. Using the blueprint, locate the centerline at the tailblock, and pencil it on the tailblock and the sides. Make a wooden form to hold the F5 rim tightly against the body form (remove the rubber bands from the F5 rim). Glue the mandolin's top into place with the body form still inside the rim assembly. Be sure the centerline (and the scroll area of the F5 rim) is aligned properly. Remove the body form (important!) and glue the carved back into place on the body assembly. Trim away the excess top and back wood around the entire body. File and sand a smooth vertical surface around the F5 scroll. Using a bandsaw, cut the F5 scroll's curved slot according to the blueprint. When a broad wooden platform is clamped to the bandsaw table, spool clamps can be used to hold the body assembly level while cutting the scroll, as illustrated. Cut and shape the F5 point protectors and glue them into place on the corners of the body assembly. Trim them when the glue is dry. Rout the top and back for bindings. Notice how the bindings rise at the scroll of the F5 body. We recommend a Dremel tool and a binding router attachment for working in this area. Use knives and chisels to finish the binding ledges in the tight areas inside the scroll. Be sure all the ledges are deep enough—if the bindings protrude out too far, sanding will thin them and detract from their appearance. Bend the body bindings for the F5 scroll by using a heat gun or a hair dryer while wrapping the binding around a dowel of the correct size. When the binding cools, it will retain the shape of the bend. Miter the ends of the bindings. Shape and bend a short strip of binding for the "button" at the neck heel position. Install the bindings using binding cement and rubber bands or masking tape. All bindings should be allowed to dry at least 24 hours before removing the rubber bands or tape. Sand and scrape the bindings level with the top, back and sides of the body. Fit the neck into the body joint. With a straight edge in the truss rod slot, check the neck alignment. The centerline of the truss rod slot must be aligned with the centerline at the body tailblock. Trim the dovetail area or place shims in the neck/body joint for proper neck alignment and a good tight fit without glue. It will be necessary to remove some wood from the bottom of the neck heel to let the neck fit down the proper amount. Use the supplied veneer for shims (sand the veneer thinner when necessary). Do not use glue yet. Mark the shims and set them aside for use when gluing later. Place the neck into the body's dovetail joint. The top surface of the neck (without the fingerboard installed) should extend 7/16" above the top of the neck block. Slide the 15th fret crosspiece assembly over the neck's dovetail tenon, and push the crosspiece toward the neck until it fits snugly. Mark the position of the crosspiece on the mandolin's top. Remove the neck and the crosspiece, and cut away the top wood so the crosspiece will rest on the mahogany neck block. Refit the neck and crosspiece, and glue the crosspiece onto the neck block (use wax paper to keep glue away from the neck joint). Remove the neck when the glue is dry. Insert the truss rod all the way down to the bottom of the neck slot. Be sure the nut and washer will fit correctly after the rod is in the neck. Cut the filler stick to length and insert it above the truss rod. Press it down firmly and clamp it lightly. Squeeze a little glue into the joints between the neck and the filler stick, but don't get glue on the truss rod (the rod won't function as well if bonded to the neck). Sand the filler stick flush to the neck surface when the glue is dry. Cut out a truss rod access hole in the peghead overlay veneer. The hole must be small enough to be hidden by the plastic coverplate. Glue the peghead overlay veneer onto the peghead face. It should overlap all the way around. When dry, trim the overlay edges flush to the peghead contours (including the areasinside the F5 peghead scroll and "hook"). Let the veneer overhang slightly where it will meet the string nut. Drill the pegholes through the overlay from the back of the peghead. Use a wooden back-up block clamped to the peghead face to prevent splintering. (Optional) Obtain mother-of-pearl or abalone inlays, saw them to the desired pattern, and inlay the peghead. Patterns are provided on the blueprint. Sand the inlays flush to the peghead. Using a Dremel tool, rout the upper edge of the F5 peghead for bindings, and use knives or micro chisels to clean up the tight corners (binding the A5 peghead is optional). Trim the peghead bindings according to the blueprint, and bend the bindings as done previously for the body. Miter the corners, glue with binding cement, and use tape or rubber bands to hold the bindings in place until the glue dries. Sand or file the back of the neck to a gentle V-shape if desired. Shape the neck heel to conform to the "button" contour of the mandolin's back. Sand the neck and the body with 220-grit paper. Recheck the neck fit using the shims made previously. Glue the neck into the body joint, and clamp it overnight. Be sure to wipe off excess glue around the dovetail joint. Sand the top of the crosspiece flush to the neck/fingerboard gluing surface. Fit the fingerboard extender onto the mandolin's top, adjacent to the crosspiece. Check the alignment and height, and remove wood from the front edge and/or the bottom of the extender when necessary for a good fit. Contour the crosspiece as shown in the blueprint. Use a round file, and finish with fine sandpaper. When properly aligned, glue the extender into place. When dry, carefully sand and level the entire neck/fretboard gluing surface, using a long flat sanding block. Shape the fingerboard according to the blueprint, with allowance for the thickness of the binding. Refer to the blueprint, and glue the bindings onto the sides of the fingerboard. Trim off the excess binding material using files, scrapers and sandpaper. Inlay the pearl dots into the fingerboard and sand them flush. Install side dots in the F5 fingerboard binding. Side dot materialis supplied as a thin rod. Drill a 1/16" hole in the binding, superglue the rod in the hole, and clip off the excess. Repeat for the other dots. There are several ways to fret the fingerboard. One way is to completely fret the board and then glue it onto the neck. Alternatively, the board can be glued onto the neck and then fretted. We suggest the following method: Trim and install the 15th through 29th frets. We recommend our book Fret Work Step-By-Step for instructions on fretting. Align and glue the fingerboard onto the neck. The 15th fret should align with the "stripe" of the 15th fret crosspiece, and the fingerboard bindings should be flush with the sides of the neck. Clamp the fingerboard with soft cauls to protect the frets, and let the glue dry overnight. Trim and install the remaining frets. The back of the neck must be firmly supported when hammering the frets into the slots. Level and recrown the frets using appropriate files (see the book Fret Work Step-By-Step). Form a 3/16"-wide slot for the string nut by removing the excess peghead overlay near the fingerboard. Shape, slot and glue the string nut into place. Use the tailpiece of your choice to locate the endpin (strap button) position. Drill a slightly undersized pilot hole for the endpin, and use a reamer to match the hole to the endpin taper. Install the tailpiece and endpin, and the tuning machines, bridge and strings of your choice. Use a reamer to fit the tuning machine bushings in the pegholes. Make all necessary adjustmentsto the bridge and the string nut for proper string height and bridge foot contact. Remove the strings and hardware. Mask the fretted surface of the fingerboard, and the truss rod adjustment nut. Stuff a few paper towels loosely inside the F-holes to catch finish overspray. Clean and fine sand the mandolin. Refer to our book Guitar Finishing Step-By-Step for information on finishing procedures. Stain the mandolin if desired. Scrape the plastic bindings lightly to remove stain. Apply the finish of your choice. Remove the masking tape, extract the paper towels and polish the mandolin. Reinstall the parts and restring the instrument. Adjust the bridge position for proper intonation and string height.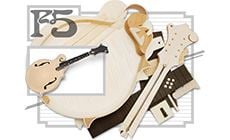
Recommended tools, supplies and reference materials
Standard Tools
Additional tools
Reference material
Supplies
Body construction

Binding installation

Neck joint fitting
Neck preparation
Neck installation
Fingerboard installation
Final fittings
Finishing


