Driftwood Guitars Builds the StewMac Cigar Box Guitar Kit
Join Driftwood Guitars' Chris Alvarado and Matt Fiddler as they build our Cigar Box Guitar Kit! This is the perfect project for beginners and pros alike.
Video Transcription
Chris Alvarado: Welcome to Driftwood Guitars. I'm Chris.
Matt Fiddler: And I'm Matt.
[on-screen text reads: Follow @DriftwoodGuitars and @Fiddler_Matt on Instagram]
Chris: Matt and I have come to the conclusion that there are basically two people that tune into our channel regularly.
Matt: I don't even know if that's us. That's YouTube telling us.
Chris: YouTube, yes.
Matt: We get some pretty good analytics and it tells us a lot about you guys. You'd be amazed. I'm looking at you, Jason. See, there's one Jason out there who's going to be really scared about that now.
Chris: I don't remember what I'm saying now.
Matt: I'm sorry.
Chris: The first type of person that watches this channel typically doesn't subscribe to it, so make sure you do that first [laughing].
Matt: Smart, smooth, real smooth, nice.
Chris: The first person is the type of person who watches our channel and has dabbled in guitar building, has maybe built one guitar, or a kit guitar, or built 30 guitars.
Matt: The second type of person that watches our channel has probably never built a guitar in their lives. You guys are probably the majority, honestly.
Chris: Yeah.
Matt: Guess what? This video is kind of for you, because let's say you've seen some of these videos. Maybe you are peripherally interested in guitar making. You're just like, "Hey, I'm not ready to take the plunge. I'm not ready to go full in yet. I kind of just want to try it out." Well, we have just the thing for you.
Pricing
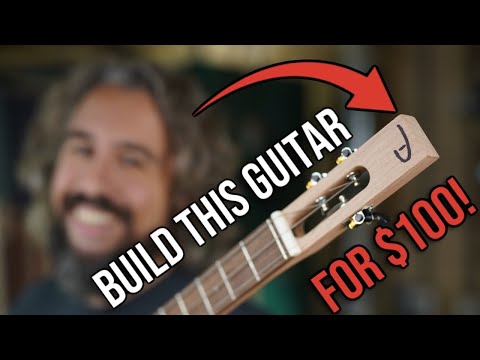
Chris: Cigar Box Guitar Kit [Chris lays the StewMac Cigar Box Guitar Kit box on the workbench].
Matt: That's right.
Chris: Coming in at a grand total of basically a hundred dollars. It's a $103.99 right now.
Matt: Okay, yeah.
Chris: According to the website.
Matt: It's always that extra penny.
Chris: These little Cigar Box Guitars, A, like we said, they're a hundred dollars. You require almost no tools to put it all together. You could do it in a weekend. It basically comes with everything you need.
Matt: At the end of the day, we just want as many people as possible building guitars, because we love it and we want to share that love with you. And if this helps get you interested in it, then yeah, do this.
Chris: So what we're going to do, Matt and I are going to try to build it all on camera here for you guys. Yeah, so with that said too, it's close to the holidays. If you like this thing and you think it might be a good gift for yourself or for somebody you know, we will have a link down below.
Matt: All right, let's crack this thing open.
Driftwood Guitars Products
Chris: We interrupt this programming to tell you guys a little bit about some of the products that we sell, one of them being this awesome paint handle for those of you that are maybe respraying a guitar, or following along with one of our builds. And you're looking, "How can I hold my guitar while I spray it?" We have the solution. Check these guys out. We have them in a link down below, as well as our fret caddies that we've started selling. And these are awesome for refrets or just general guitar maintenance. You put your loose frets inside of here, your bridge pins here, and any sort of metallic hardware that you have inside of there just to help keep your workbench organized. So check those out. We do have links down below and we'll ship them today.
Prepping the neck
Matt: Geez. Instructions [Matt throws the instructions booklet across the room], who needs them? [laughing]
Chris: We do!
Matt: I'm kidding. We need them. We might actually need those.
Chris: It looks like it's already put together.
Matt: I'm going to do the thing that luthiers do.
Chris: Ah, pine. Okay. So it sounds like the first thing they're asking us to do, and a lot of folks probably at home would skip this step. They're asking us to go ahead and make sure that we hammer these frets and get them perfectly level, and then we're just going to do a fret level.
[Matt sets the Fret Rocker onto the frets and works his way up the fretboard checking to make sure the frets are level]
But Matt and I aren't going to do it if we don't have to. But with that said, we're not going to do it, but we're going to check with the proper tools first. And if you're at home and you decide that you want to do one of these kits and you don't want to do a fret level, you're probably going to be able to get away with it.
Matt: Yeah, yeah. We're good.
Chris: We're not doing a fret level, so we can actually skip the whole preparing the neck section. We're going to skip to building the body, and starting to put this bad boy together. And I think that this is what needs to happen, is this goes like this.
[Chris sets the neck block and tail block into the ends of the body top]
Building the body
Matt: I'm doing the thing where I don't even, I just look at the pictures.
Chris: And we'll follow the instructions just for the placing of these screws. Why not, right?
Matt: Yeah.
Mark out the block attachment screws
Chris: Which is 1-1/8" and 9/16" [Chris sets the Luthiers Digital Caliper]. Oh god. Why are there fractions? Matt knows I hate fractions. I see. So it's going there, and it's going there [Matt uses the caliper to mark the body with the measurement].
Matt: Yeah.
Chris: And there.
Matt: Nice. Is that seated? Yeah.
[Matt drills two holes into the end of the body top]
Chris: Right into his hand.
Matt: Right into his hand. Yeah. All I want for Christmas is a trip to the ER.
Chris: You can dry fit. Real men don't do that [laughing].
Install the tail and neck block
Matt: There's no way that comes back to bite me [laughing]. Nice and gentle, like.
[Chris applies wood glue to one side of the neck block and tail block and sets them into place in the body top]
Chris: This is a really fun little project to do, especially if you've got little ones who are of an age where they're interested, and kind of into guitars or just interested in making things.
Matt: Yeah.
Chris: I know that for me, all it took was kind of the realization of like, oh yeah, I can build a guitar. It wasn't even on my radar. And then one day the idea of building was presented to me is like, oh yeah, I was in my 20s.
Matt: Oh, wow.
Chris: The idea that as a kid you'd stumble into this as kind of a hobby would be a really useful thing. Even if this is the only thing you ever do, it's just fun to hang out with your kid, sometimes [laughing].
Fit the neck
Insert the neck into the body, face down, seated against the underside of the top and through the neck pockets. Look at that though. Look at that.
Matt: Yeah, that's in there now.
Chris: We're trying to show you guys how fun and easy this can be. We're kind of doing it the easiest way.
Matt: Yeah.
Chris: Okay. I feel like we're good there. We can turn the page.
Matt: Yeah, like Bob Seger.
Fitting the hardware and electronics
Chris: Exactly. Okay, so now we're going to do fitting the hardware and electronics. So here's what's crazy, right? All we got to do is run our four screws on the back of here and physically this entire instrument is now put together at this point.
Matt: Wow, that happened fast.
Chris: Yeah. Structurally, we now have our Cigar Box Guitar basically in place. Everything moving forward now is going to be tuning machines and pickup install. And wait for it. Look at them fellas [Chris holds up the instruction booklet and points to a picture of Chris and Matt]. Look at them [laughing].
Matt: Yeah. Hey, who does that look like?
Install the tuners
Chris: So three tuning machines. These are open gear tuning machines [Matt starts putting the tuning machines together]. You don't have to do this obviously, but anytime you're running screws into that you want to eventually be able to remove, if you have some sort of, we use this chunk of beeswax that we have. You can use a candle. And everybody's typically got at least one candle, I prefer a nice pine scented one. But no, you're going to take your screw and just put a little bit of wax on the threads and it can make a huge difference in, A, how easy the screw runs in. But also, you won't break screws, because we've broken screws, especially cheap screws. On a kit like this, is probably not the highest quality screws in the world. They can break, or they can crack and split the wood. So by doing a little bit of beeswax on there, it can absolutely-
Matt: All the difference in the world.
Chris: ... alleviate all that. Yeah. How are you supposed to tune this thing?
Matt: I think you can do open tuning or you can do the top three strings of a guitar.
Chris: All right. We now have tuning machines installed. Looking good too. Look at that.
Matt: Dude, yeah.
Chris: Another thing that's kind of fun, it's not advertising here, but if you want see this is laser etched. You could sand that off and put your own little logo up there.
Matt: Should we do that? Should we sand it and put our own? Should just put a driftwood... I'm going to do that. Hang on.
Chris: There we go [Chris takes a sander and sands out the default logo etched in the headstock]
Matt: There it is [Matt draws a piece of driftwood on the peghead].
Chris: Boom.
Matt: All right, you ready? Here. We're going to give you a nice sweep like that and then like that. Optional step. You don't have to do this, but we did.
Install the nut
Chris: So now what? So we are going to do the nut install now. It's absolutely... Feel that, it's completely, absolutely perfect.
Matt: Oh, nice.
Chris: So she's calling for glue just on the outside edges here and not over the truss rod [Chris glues the bottom of the nut with StewMac Super Glue and sets it into place].
Matt: Oh, that makes sense. I too find that truss rods work best whenever they're not glued in place [laughing].
Chris: Exactly. Spray some accelerant on there and then I'm going to make sure that I get this thing perfectly lined up. Yeah, we can go ahead and rough install that pot, but we don't need to. It says to not wire anything quite yet.
Matt: Makes sense. Feeling good, looking good.
Fit the pickup
Chris: Orient the P90 is not critical. Orientation is not critical, but for easier wiring, install it so that the side of the wires are closer to the volume pot.
Install the tailpiece
Looks like what we have next is installing the tailpiece [Chris screws in the hinge of the tailpiece]. Don't strip these out now.
Fit the sound port rings
Fitting the sound port rings [Matt smacks the sound port rings down into the body with his hands].
Matt: Just... Yeah. Done.
Chris: So now Matt's going to get the soldering iron out and we will get this thing wired up.
Matt: There we go.
Chris: You just want to take a piece of metal, something metallic and touch up against some of the magnets on the front here. And we're working.
Matt: Easy peasy lemon squeezy.
Install the back
Chris: We're going to go ahead and close up the body now, which we pre-drilled already. So now we can just kind of put it together, right? Where'd those screws go with these here?
Matt: Yeah.
Chris: Perfect. Okay.
Matt: All right.
Chris: So we now have ourselves a-
Matt: Oh, a body with a bunch of scratches on the side.
Install the strings
Chris: Yeah, exactly. The next step is just going to be your installing of the strings and checking all of your string action, and all that stuff. As much as this may not be a full guitar, it's only a three string instrument. It's not really a full guitar, but doing a kit like this, as Matt makes all the racket... Doing a kit like this-
Matt: What were you saying?
Chris: Oh, Matt, seriously, you're still going to learn some really, really useful skills. Those initial fret leveling steps that were at the beginning of this that we didn't do. And then this part, which is the stringing up, and getting all that dialed in and set up, they're all going to be very useful skills for you when you do hopefully your second guitar build after this one. The bridge is really cool. It's this little block of wood and then we are going to put, it looks like a 1/4-20 threaded bolt that's going to go on here. And then the strings are going to come up through here, and then up and over.
Matt: Perfect.
Chris: And that's kind of the whole shebang there. Follow the steps in this book if you don't have the tool that I'm about to get.
Matt: Yeah.
Position the bridge and saddle
Chris: The step to finding the bridge location, super important. Bridge location is going, if you don't get it in the right spot, you're going to have crazy intonation issues. Bridge location is determined by scale length, and all that scale length is the distance between the nut, and the 12th fret times two. What they're calling for in the instructions here is using a straightedge, and measuring that distance, and marking it, and then extending that distance out this way. You don't need this tool. We have this tool. This is a saddle locating tool that we have, so we're going to use it instead. Once again, you don't need it though, so this is just going to make our work a little bit easier. And then we're going to flip it around. All right, so we got that marked. This should all be pretty much dialed in. The height of this block too should be set up so that when we run the straightedge on here... Action's actually going to be pretty high if we were to do that.
So what we can do if we want to is, I can actually remove the thickness of the material under here, underneath this wooden block, so that when we put the strings on it that the string action's actually usably lower. I have gone ahead and sanded off some material up here, and now when I set the bridge and saddle on this Cigar Box Guitar, I'm getting the string height that I want, probably plus just a little bit. I'm actually just kind of using my eyeballs here. Nothing absolutely crazy. I did check it. It does look a lot better. It was at like 0.140" and now we are at 0.110", so it's just a little higher than I would normally do it, but I feel really good about it. So yeah, we'll have Matt kind of get the ball rolling here.
[Chris is playing the Cigar Box Guitar hooked up to an amp]
Matt: Yeah.
Chris: All right. Okay, so we got this thing strung up. We've got the bridge in place. I did actually need to lower it a little bit more. I checked with a nice tuner to check my intonation and then adjusted this accordingly to get it so that we're in tune in the open position on a 12th fret.
Matt: Yeah.
Chris: It's cool, man. It was a fun little project and we ended up...
[Chris starts playing the Cigar Box Guitar. Audience applause]
Matt: Nice.
Chris: It does the job, man. So this has just been really cool. It's a really great way, like we said in the beginning of this video, to get into guitar building, get your feet wet. It's a hundred dollars for this kit. We're going to have links to it down below. We'll put links to some of the tools that we have in here, reminding you that you don't need most of the tools that we used in here. You can get away with not using any specialty tools whatsoever for this build. Really fun for yourself. Really fun for you and a child of yours, if you have it. If you know somebody who's just interested in making things, this is a great introduction, just to get into building something that can be used for years to come after that. Hope you guys enjoyed this video and start building guitars, man.


