Making custom guitar bindings when stock sizes don't fit


Issue 211 February 27, 2014
Replacing a section of this binding from the 1930s requires thicknesses that are no longer available. Dan Erlewine has to custom-size some new wood bindings on his drill press. It's not hard to do: watch the new pieces fit together like a jigsaw puzzle.
About the guitar in this video: This is the third Trade Secret in a row featuring this great 1930s Kay Deluxe. It's nearly done now!
- "De-Gooing" the glue joint
- A micro-chisel that's been ground down to be a "mini-micro" (nano?) scraper
- Using the drill press as a thickness sander
Video Transcription
[on-screen text reads: Trade Secrets!]
Sanding bindings to a custom thickness
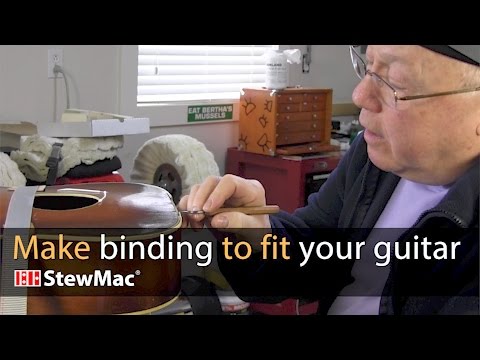
Dan Erlewine: The neck block on this 1930s Kay Deluxe was loose for years from the top. The neck was on and it was under string tension and it forced that block towards the sound hole. It remained glued down here, but up here it was caved in. It broke the binding, it warped and crushed the plastic. Some of the wood binding it's maple and ebony, or it's a lighter wood color to look like that, had fallen out and been lost. And I'm about to make some pieces to put in it and replace it. The problem I had with this guitar and the binding work is that it's not a standard size wood binding. Back in the 1930s, they had 50 thousandths maple and about 38 thousandths ebony. What I can buy off the shelf is 80 thousandths thick. So I made my own binding and brought it down to size using my drill press and a drum sanding setup.
Make your own binding
This drum sanding rig is adjustable. The fence moves in and out so it doesn't take long to come down from 80 thousandths to 40. You got to measure along the way and maybe you'll adjust it three or four times. What I do is run the strip in and then ride it up and down along the fence so I'm covering the whole length of that drum. If there's any irregularity in the turning of that drum, it balances out because you covered the whole piece.
"De-goo" the glue joint
To prep this area for the new binding, I had a few things to do first. I had all the old glue from the factory, my glue squeeze out, and it was hide glue so I cleaned it with De-Glue Goo [on-screen text reads: Dissolve waterbase glues easy]. It's got acetic acid in it and I applied that with a little toothpick. It's like stripper for glue and I laid it on thick, gave it 20 minutes, 10 minutes, and came in with a little Micro Chisel and I scraped it cleanly. I don't want to mess with the wood channel. I've left that alone so far. After that, I come in with some TSP [on-screen text reads: TSP cleaner from the hardware store] mixed with hot water. That neutralizes the acetic acid so it won't stay there forever and make that joint come loose later. And I applied that with a little cotton swab, several applications. And then I went in with a damp rag, clean water, and cleaned that and let it dry.
Clean out the joint with a micro-chisel
At that point, I was ready to come into the channels and clean them out. My biggest tool was a micro chisel [on-screen text reads: Handy little chisel - Micro Chisels, Set of 4 from StewMac] that I ground really skinny on the belt sander and grinder so I could get in between the binding layers. I'm sticking my binding in in step layers. That way, the binding holds it in. This black is inside the white on both edges. There's always a little overlap on every joint so it doesn't just fall out. I didn't try to take much wood off. I tried to leave it original. There's a little bit of glue left here [on-screen text reads: See details as clearly as Dan - OptiVISOR Headband Magnifier from StewMac]. The ends of my pieces sort of overlap. That kind of helps hold them in. Later on, I'm going to hold them in with some tape.
[Dan presses and sets the new binding into the binding joint]
File, scrape and sand the binding
That's what I have. Now what I want to do is tape this in place and file it down a little shorter so it's closer to the size. Then when I tape it in place with glue, it won't fall over because it's so tall and the tape will bend it forward. I won't go all the way down, but I'll just take it close. Before I do that, I'm going to lay out some TransferRite sign painters tape [on-screen text reads: TranferRite tape from a sign shop] on the finish because I can't tape on this. It'll pull the finish off. Some pieces of binding are taller than others and I've got it taped in place dry using Binding Tape. And I'll use a #11 blade or a chisel, some tooth files and bring the wood down closer to the surface for the final glue up.
Glue in the binding
This came out better than I expected even. It's not perfect, but it's really good enough. I'm done with my filing and scraping and sanding and it's ready for a little bit of touch up. Up until now, what I did was glued all my strips in with hot hide glue, painting them very carefully into the channels, put a piece in. Then I'd paint the face of that piece so each layer would have glue to adhere to. Right now, it's too white. The wood's too white, and so is the plastic. And I'm going to send it out to my friend Elliot's shop for a little touch-up. He's got a great spray set up there and he is a real good touch-up man.
Touch-up the color
Elliot John-Conry: Our touch-up is going to be more about delivering a little color and a little bit of shine to this area. It's not really about building much of a finish. I think a light coat of shellac with a little amber color in it will do the trick. It shouldn't take more than a couple hours to take care of this.


