A knife in the back! Popping the back off a 1929 Gibson L-5.
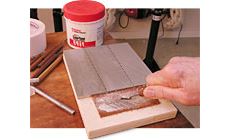
Popping the arched back off a 1929 Gibson L-5 using very sharp blades. I think I can fix it, but first the back’s got to come off. That’s what this story is about: using sharp knives and chisels to carefully undo what Gibson craftsman put together eighty years ago. I want the back to come off with the vintage binding around it intact — all as one piece. I’ve seen Don MacRostie pop the back off a ’20s Gibson mandolin this way, without using any heat or steam. The idea is to work a disassembly knife into an open seam between the binding and the side. Once it’s in there, I'll work the knife left and right — prying, separating, and popping the back off with the binding intact. Inside, the kerfing that supports the seam will break naturally along its grain. Working slowly around the edge, I used two knives, leapfrogging one next to the other. A dry, cracking sound told me the wood was separating nicely. (At the neck and heel blocks I switched to a bridge/fingerboard removal knife for its extra width.) And —pop!— off came the back. I felt like a kid opening a treasure chest. The treasure wasn’t much: a vintage “tone ball” (lump of fuzz) and an old tax seal from a liquor bottle. Well, maybe not quite that easily, but before I started removing the back I made sure it would fit back on without problems: I traced the guitar’s shape carefully onto heavy cardboard with a half-pencil: a regular pencil that I sanded so its lead sits flush against the guitar. Masking tape keeps it from smudging the guitar side, and gluing it into a block of wood gives me a hand-hold. Using my cardboard cutout as a template I made a quick throwaway mold of cardboard, wood spacer blocks, and Titebond glue. This holds the body shape while the back is off. Wood dowels pinned through the layers kept them aligned while the glue dried. A relic finish and pre-World War II style make these a perfect fit for vintage guitars! Available for solid or slotted pegheads. Check it out. I planned to replace the kerfing, so I needed to remove any remaining bits of old kerfing from the back and sides. Here I'm scraping up to the inside of the lip formed where the binding meets the back. With styrofoam above and carpet below, the clamp holds the arched top gently. My widest micro-chisel, kept razor sharp, pared away the wood easily — and along with it the crunchy old hide glue. The plastic binding was installed with a solvent-based glue, and the binding had melted into the kerfs and dried hard. Each little remnant had to be removed for the back to fit back in place over new kerfing later. Don’t ask a dull blade to do this. It takes a very sharp chisel to cut cleanly through this tough old glue and plastic, and these materials dull the chisel constantly. To keep a good edge, I used coarse, medium, and fine diamond fret levelers as sharpening stones, fastening them to a plywood board with double-stick tape. I also fastened a strop of leather at the front, smeared with medium-grit ColorTone polishing compound to maintain a razor edge. A gap had opened in the center seam of the collapsed back, and it had been in that state for years. Worse, someone had tried to fix by globbing in a lot of epoxy. The job now was to separate the halves of the back and clean the seam for reassembly. I slowly warmed the joint with a heat gun, and then pried it apart using all my knives — the seam separator, the fingerboard removal knife and the offset knife. With the back separated into two pieces, the slow process of cleaning away the epoxy begins. I’m pretty confident the reassembled back will fit back on the guitar neatly, since my cardboard mold is holding the guitar sides in the exact position they’ve been in for years and years. Wish me luck! If I run into surprises, I’ll show you in an upcoming issue.A knife in the back!

The arched back on this 1929 Gibson L-5 had collapsed. Instead of curving out, it’s buckled in.


After the repairs, the back will go back on with hide glue — like a Tupperware lid.


Check it out!

Golden Age Restoration Tuners


OK, it’s time to get sharp!
Now the repair begins


