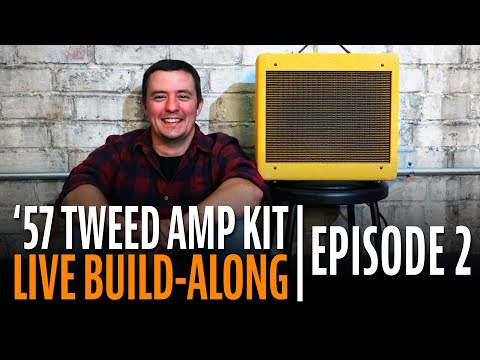
Episode 2: SAFETY+SETTING UP THE CHASSIS
V-AMPEP2
If you've ever thought about building your own hand wired amp, but weren't sure where to start, this replay of our live build-along series has all the tips you need.
In this 5-part series we show you step-by-step how to build our '57 Mini Tweed Amp Kit, with the famous 5f1 circuit. Even if you're a complete beginner don't worry! In this second episode we go over tools, safety, setting up the chassis, preparing the components, running your wires, and more.
Video Transcription
[on-scren text reads: '57 Tweed Amp Kit Live Build-Along - Episode 2]
Pete: Hi, everyone. Thank you for joining us. My name is Pete and we are live again from StewMac Studio. This is episode two of our '57 Mini Tweed 5 watt amp build. We're doing a live build along so you can ask your questions and follow along with us from home. Well, last week in episode one, we got the cabinet prepared and then prepared our eyelet boards. This week, we will be taking an empty chassis and populating it with all of these components here, so quite a lot to get into. So I think I'll go ahead and well, let me introduce everyone. If it's your first time with us, welcome. If you're joining us again from episode one, welcome back. I'd like to say thank you to Tommy Stumpp for leading us along.
Tommy Stump: Thanks, Pete.
Pete: As always, we have our wonderful videographer, Rachel.
Rachel: Hello [inaudible 00:01:32].
Pete: And our fantastic director, Susan. So let's see, Tommy, I think we should get right into it. We got a lot to cover today, right-
Safey first
Tommy Stump: I agree. Yeah, thanks Pete. So like Pete said, we're going to get to populating all of our components into that steel chassis. But first, we have to talk a little bit about safety. Anytime you're working in a live circuit or an amp that's been plugged in and turned on with tubes, you need to be extra careful. They can store voltages and those voltages can be dangerous or deadly, so we really recommend you have a multimeter to make sure your circuit is safe and ready to work on. And we showed you in the first episode, how to use a Snuffer Stick to discharge those filter caps, if indeed your amp has been up and running.
Just good things to talk about and make sure you have good habits from the get go if you're starting out with amplifier builds. So other safety precautions, you don't want to wear a ring or any jewelry that could cause a electrical connection to your circuit. It's good to wear no loose fitting clothes, rubber soled shoes. It's good to have somebody around if you're new to this or if you're working with high voltage, just in case you do get a shock, if you need any kind of medical attention. We're not going to get into any of those dangerous voltages in this episode because we're still populating our boards, but just good things to always keep in mind. Better safe than sorry for sure.
Pete: Of course, always unplug your amp when you're working in it. Even if it's just turned off, you've still got voltage stored in those capacitors. So make sure it's unplugged and stay suspicious, just make sure you're being cautious. And of course, you don't want to work very tired, you can get a little loose, little less precautious.
Tommy Stump: Yep. Definitely good to make sure you're comfortable too. If you're uncomfortable, if you're cramped, if you're working in a way that's awkward, you're more likely to make mistakes and miss little details for sure.
Pete: Yeah. And also you want to check, make sure you didn't leave any tools in the chassis, make sure you don't get any shorts that you're not expecting. All right, so last week we... we, I should say I got a little excited about getting into this amp build. I've never done one before and we kind of skimmed over the tools list. So before we get into the parts list, I do want to mention that you can find the tools list on page five of our instructions, right after the parts list on page three and four. There was one tool, Tommy, that I was surprised to see on that list. I was hoping maybe you could tell us a little bit about the wooden chopstick?
Tommy Stump: Yeah. It's funny, but this is maybe your best tool as far as testing, troubleshooting and also just general poking around. You don't want to use a tool, once your circuit has been live, that's metal. Even if you discharge your caps, if your amp is or has been on, you could still short things out, make arcs, so a wooden chopstick is a great tool. Often we use this when there's something wrong with the amplifier, we turn the amp on so you can hear and then we start poking around on components. You can also move wires around to decrease interference, call this lead dressing. This is a perfect tool for it. It's thin, non-conductive and you can get them pretty cheap at any local Thai food store. Just eat the food after you work on your amp.
Susan: Tommy [inaudible 00:05:27] is the amp turned off?
Tommy Stump: Oh no, I'll get that. Sorry about that.
Susan: [inaudible 00:05:32].
Pete: All right. Well, while Tommy is turning that off, we're going to keep moving along. Like I said, we've got a lot to get through today and we want to keep on rolling. So we're going to take a look at the parts here. Tommy, can you show us through that?
Step 9: Prep two terminal strips
Tommy Stump: Yeah. So first we're going to mount our two terminal strips... or we're going to prep them, I'm sorry. So there are two of these in your kit. These form the ground connections to your chassis and they're just super important, small and mighty. So what we're going to do to prep these, is cut this little tab, can you see that Rachel?
Rachel: Yes, I can.
Tommy Stump: So what we're going to do is cut a access for that, so it'll just slide onto a mounting nut. You can cut them straight across if you like, but I like to cut them on a bit of an angle, so you have more surface area with the chassis. So again, these are just normal kind of wire cutters. This metal isn't too crazy strong or anything.
Pete: And for those of you following along in the instructions at home, this is step nine on page 12.
Tommy Stump: Yeah. So now you can see I've got a little more surface area to get that under that bolt. These will be sharp, you can file them down if you like, but they're just going under a bolt or a nut, so it's not super important that you cut those off. One thing we didn't mention is eye protection. During a couple of these steps, there may be flying metal and solder can spit, so we recommend you either have safety glasses or if you have bad eyes like me, just wear your glasses. All right, there we go, got those ready. I also like to keep a waste bin right next to me. Keeping a tidy bench is really important, so just a good habit to get into. So I'm going to cut my two pieces, 1" off each and that's the green wire, comes with every kit.
Pete: And what gauge wires are we going to be using in this kit?
Tommy Stump: I believe these are 20 and 22 gauge wires. It might call it out in the instructions, but it's all solid core wire, aside from the stuff coming out of the transformer. And this is pretty good pushback wire, really common in old amps and a lot of boutique builders use this. You can strip the cloth insulation off or you can just push it back. Pretty easy to use and it holds its shape nicely, so you can really get it where you want it without too much fuss. So I pulled that insulation off of these leads. What I'm going to do is bend one of these into a kind of zigzag and then wrap it through my terminal strip. That little zigzag will help it hold in there and then what I'm going to do is go ahead and solder that right away. And I'm going to use my little helping hands here to hold everything in place, just get that under there.
So I've got my iron on around 390, that's probably a little hot. I usually go 370 or 380 Celsius or 700 Fahrenheit. And again, good soldering means you get even heat on the component and the lead. You want to have a nice, shiny connection like that. And good soldering starts with good physical connections as well, so you want these to be wrapped as solidly into that metal bracket as you can. A good physical connection means you're going to have a good electrical connection.
These do get hot, so take care when you're working with them. There's no right or wrong way to get this in there. As long as it's all connected, you're good, but this keeps it pretty neat. Go ahead and get that guy here. There we go. You can see that solder jump onto that bracket when the final connection is good to go and made. I'm going to bend this guy down. Get a good blob of solder there. Is that a good angle, Rachel?
Rachel: It is.
Tommy Stump: Cool.
Rachel: [inaudible 00:10:26].
Tommy Stump: Yeah, we kind of lost it. So that's not a great connection, I'm just going to hit that one more time. All right.
Pete: And-
Tommy Stump: Essentially, we're just going to do that whole thing twice.
Pete: And while Tommy is taking care of the second one, again, I do want to mention we are live here, so please feel free to comment with any questions you may have in the chat and we'd be happy to answer them.
Tommy Stump: Yeah. So I will say this, even the black fiber board gets hot. If you touch any of the metal parts right after you've made this connection, prepped your strips, you may burn yourself, so just take care. Let it cool before you start grabbing it. Is that a decent angle, Rachel?
Rachel: Turn it a little more towards me.
Tommy Stump: Yeah. This way?
Rachel: That's perfect right there.
Tommy Stump: Okay, let me get that lead back in there.
Pete: All we do have, it looks like Victor... excuse me, Victory Guitar Shop in the chat, says he's thinking about getting a kit at some point. While we're building the '57 Mini Tweed five watt amp Kit, it is just one amp kit in our Icon series. So we have a '57 Mini Tweed five watt, obviously. We also have a '59 Tweed 15 watt, a '62 Brit-Plex 45 watt, a '65 P-Reverb 15 watt as well as a '66 D-Reverb 22 watt.
Tommy Stump: Yeah. And they're all great, they're all classic circuits. A lot of the modern designs are based on those, that little group amplifiers right there, including this one.
Pete: Yeah, and for more information on this specific amp, we do discuss that a little bit more in episode one, which will be always up on our YouTube channel. So feel free to go back through these series as you build along, if you missed any or... it's just full of great information you can always review.
Tommy Stump: Yeah, for sure. Is that a good angle, Rachel?
Rachel: Yes, it is.
Tommy Stump: Cool. That looks like it could use a little work. There we go. And again, I'll just turn it back over, mush that wire down. And this guy is just loose, there we go.
Pete: Here's a good question from Sassy Cat, Tommy-
Tommy Stump: Welcome back, Sassy Cat.
Pete: ... says, "Does the P-Reverb have a tremolo circuit?
Tommy Stump: It sure does, absolutely. It's the AA1164 circuit, which you can look that up, figure out where we might have gotten that amp from. So this one is all ready to go to. We're going to set those aside till we get our power transformer mounted. So we're moving on, that's the end of that step.
Step 10: Mounting the power transformer
Pete: Yeah, onto step 10, mounting the power transformer.
Tommy Stump: Right on. So this is the biggest, heaviest component, probably the most expensive component in the kit, aside from your time. These have two sets of leads. You've got your primary and secondary lead. Primary is the side that connects to your wall, secondary is the side that connects to the rest of your circuit. I'm going to pull these black rubber things off of here. Those are just to protect it during shipping. Toss those. I'm using pliers, you can sometimes get them with your fingernails. But as someone pointed out last week, if I've got pliers right here, why not use them?
So now I'm going to see if I can get these bolts off of here and that's the wrong size, I think. So what I'll do is grab those bolts, they're going to be a little bit tight, just because sometimes they have coatings on them. So sometimes they'll start right away, sometimes you need to grab the other side, but once you get them going, usually not too much trouble. I like to use a full size screwdriver for this. Are there any more good questions, Pete?
Pete: Not seeing any right now.
Tommy Stump: Did you have any questions?
Pete: I'm wondering, you said that the primary side of that power transformer is taking your wall voltage. Why so many leads?
Tommy Stump: So on this one, we have taps for the most common international voltages. So we have a tap for 100, say if you're one of our friends in Japan, 220, 240, 230 used throughout Europe, Australia and so on. So those are all called out in the instructions. If you have different wall voltage than the US standard 120, this amp is still going to work. You may just need an adapter plug to say, plug it in in Germany. But for all you people going on tour, something to keep in mind. Who's going on tour with a four watt amp kit?
Pete: We do have one question here from Louisville Mystics and Magic, "Do you guys sell these amps preassembled?"
Tommy Stump: We do not currently. And again, the allure of this is it's a DIY project. You can buy a five watt amp kit like this, there are a lot of different places you could buy one, but this is a hand-to-hand, point-to-point-
Pete: Sorry.
Tommy Stump: ... point-to-point, hand wired tube amp kit that you're building yourself just like the vintage ones, so there's a bit more mojo than a new PCB from Fender, Vox or what have you.
Pete: So when you say point-to-point, can you elaborate on that a little more?
Tommy Stump: Yeah. So the modern amps that all the big builders are making are populating a circuit onto, basically a computer chip, a circuit board and then basically a machine puts it together. Whereas this kit, you're doing all the physical connections yourself. You're going to be soldering everything by hand and it really does end up with a good product, but also something you can be proud of that you built yourself. It's way more cool than having the same exact thing that everybody else could just go to the store and buy, in my opinion.
Pete: Yeah. And from what you've told me, it's so much simpler to service a point-to-point, hand built amp.
Tommy Stump: Absolutely. So without ignoring what I'm doing here, I'm just mounting this... these bolts go straight through the transformer and up through the chassis. And then I get each one of them on just finger tight. We need to get those terminal strips mounted in there. So I don't know if you can see that, Rachel, that one in the back corner?
Rachel: [inaudible 00:18:18] see the overhead [inaudible 00:18:19].
Tommy Stump: Yeah. But essentially, just get those finger tight and we'll tighten them down after we get our terminal strips mounted in there as well.
Pete: Okay. We do have another question from Victory Guitar Shop. They say, "I have a Marshall 1974X, do we have something comparable?"
Tommy Stump: Yeah. I think it's discontinued, but we were selling that exact circuit as a kit. So again, right now, we just have the '62 Brit-Plex, which is basically a JTM45 circuit, we have the 10731, that's our Tweed Deluxe and that's the 5E3 circuit. Get these leads out of the way.
Pete: Hey, Tommy, not to interrupt you here, but before we go much further, can we explain exactly which way the transformer needs to go in? Is there any specific orientation or?
Tommy Stump: So it doesn't really need to, but I like to mount it with my primary leads facing the front panel, secondary leads facing the back panel. If you mount it the other way, they're just going to cross. So this looks cleaner in the end. Sorry, I didn't go through that earlier. Thanks, Pete.
Pete: No problem. I think I was distracting you with questions. And just for clarification, anyone following along in the instructions, if you're looking at the page 12 here, you might be thinking, "Well, that doesn't look much like a box or a chassis at all." For simplicity, we've flattened, basically taken each of the walls and folded them outward. Just an easier way to follow along in the instructions. So when Tommy says, "The front of the chassis," that is the top panel folded out.
Tommy Stump: Right. And that is the controls and where you plug your guitar in once it's all built and done. So I've got all my bolts here. And once we're all tightened down, I'm going to loosen two of them where I'm going to put those terminal strips that we prepped. So your front corner inside the amp is where one of those mounts. Just a couple turns will get it up high enough where you can pop that tab underneath the bolt... underneath the nut, rather. It's good to have it oriented back towards the front, just to keep it out of the way. And then I'm going to hold that with my thumb and hold the nut in place and just tighten that down. Again, I'm sure if you guys bought this kit, you're familiar with using hand tools. If not, you can always email us and we'll explain it.
Pete: We're getting more questions here.
Tommy Stump: Cool.
Pete: Well, from Thomas Kutch, "Why did you discontinue the JCM800 kit?
Tommy Stump: Sales.
Pete: That's kind of what I figured, sales. And then Sassy Cat has another question, "Weren't Marshalls initially Fender circuits made with British components?"
Tommy Stump: More or less. The JTM45 is basically an exact copy of a Fender circuit, the basement circuit. Jim Marshall was a dealer or a dealer in England, but he couldn't get enough of those amps that all the British musicians were wanting, he couldn't keep them in stock. So he found a couple guys who decided they could build them just as good and they essentially used the same circuit, different power tubes. They couldn't always get all the same components, but half the stuff Fender was using was just because they had it around. So those early days of tube design was all kind of high seas, stealing from each other and learning from each other, for sure.
Pete: All right, we got plenty of-
Susan: Can we see what you did there?
Tommy Stump: Yeah, so what I've got... can you see that, Rachel?
Rachel: Mm-hmm.
Tommy Stump: I've got my two terminal strips mounted under those nuts and bolts. Those are forming a good, strong connection to the chassis. And I've got one up here, on this top right corner and one down here on the bottom left corner. That's going to be where your power from the wall gets grounded and as well as one of these secondary leads. These are super important, so do make sure you take your time, get these installed properly. You don't want them to be able to move once you've bolted those down. And again, you want to just make sure that's a good, solid connection to the chassis. I'm going to give them all just one more little turn if I can.
Pete: And Tommy, is there any issue if those terminal strips are touching the side of the chassis?
Tommy Stump: Not really. I always try to make sure they're not, just for cleanliness. I mean, there shouldn't really because they're supposed to be making an electrical connection to the chassis.
Pete: Yeah. Sending everything to ground through that terminal screw.
Tommy Stump: All right, that is the end of our step 10, I believe, so... Oh no, we still got to twist our wires. So these, like I said before, we're just going to work on our primary wires for now. What we've got here are five black wires, four of which have color coding and that denotes the alternate wall voltage. So we're going to twist those four that we're not going to use off to the side. You don't need to go crazy getting them twisted any which way, this is just for tidiness. We're not going to cut anything yet. We're just getting these out of the way.
Pete: All right, while you're doing that, I did want to address a question. Bill Manton asks, "So will you guys be keeping this series on YouTube for those of us who buy a kit at a later date?" Yes, all of these episodes will be up on our channel, indefinitely, as far as I know.
Tommy Stump: Yeah.
Susan: Yeah.
Pete: So they're always there for you to go back and review if you decide to buy a kit.
Tommy Stump: Yep. So I twisted my unused wires and tucked them out of the way. Then I'm going to twist my white and black together because those are the ones we're going to use, since we're in the US, with 120 volts AC coming from our wall. You don't need to go crazy getting these twisted any certain way, mostly for tidiness. If you have AC, alternating current, in your amp, it can be a source of noise, so you do want to just make sure that you keep those tidy and away from some of the other wires, which we'll point out later, the ones that can be problematic.
Pete: All right. So everything is twisted up now, so moving on to step 11, installing the fuse socket.
Step 11: Install the fuse socket
Tommy Stump: Yeah. So again, that'll be in your parts bin. It's a little plastic socket, a brass nut and two conductors on the inside, the part that mounts inside the chassis, also has a little washer here. That little washer isolates it from the chassis, just for extra safety. So that'll go right in our first spot here, get this guy back on there. It's my little rubber washer. Can you see that, Rachel?
Rachel: Mm-hmm.
Tommy Stump: Great. And then my brass nut goes on.
Pete: Here's an interesting question from Kevin King that I missed before, sorry, Kevin. Kevin asked, "Do you know of any kits or information on building custom guitar amp speakers?"
Tommy Stump: There's a lot of information out there about how speakers are made, but we don't really sell any of the stuff for that and we don't have any good info, aside from where else you could buy speakers. We don't have any support for custom cones or anything like that, but there is a ton of info out on the web. It's a interesting question. So my fuse socket is installed. Now I'm going to do, is get in there and just bend that top lug up a little bit. I don't know if you can see what I'm doing here, Rachel?
Rachel: Mm-hmm.
Step 12: Install the pilot lamp socket
Tommy Stump: I'm just going to get a little tool under there just so it has access because I'm going to put a lead in there. It's laying down flat, you're not going to be able to wrap it as well. So our fuse socket is in. We're going to go on to the next step. Now in the instructions, step 12 says, "Install the pilot light and socket," I like to wait on that. If you wait till the end of today's episode essentially, you give yourself access to this grounding strip in the front panel. That can be kind of tough and frustrating if you get that socket in there, first thing. So while we have it and you can certainly mount it now if you want, like I said, I'm going to wait on this pilot socket, which looks like this. Comes with the jewel lens, they all come with red. We have other colors if you like. And again, we'll show you exactly how this all goes together and comes apart at the end of the episode.
Pete: Yeah. And if you're looking in the instructions, that's going to be installed between the fuse socket that you just installed and the control pot. And like Tommy said, it's really just a good pro tip on a little bit easier access. So we'll just move step 12 to after step 30.
Step 13: Install the volume pot
Tommy Stump: Right. Yeah, and again, no problem doing it now, just going to be maybe a minor headache later. So now we're going to install our control pot. This is a switch and volume pot all in one. It's got a little tab here on the side. First thing we're going to do is snap that guy off. So just a pliers, bend it back and forth a few times, Bob's your uncle, comes right off.
Pete: All right, just real quick, a couple more questions here. 508 Droid is wondering what the namesake of StewMac is. That is a combination of our two founders, Preston Stewart and Bill MacDonald. We were known as Stewart-MacDonald for years, decades and in the last five years or so, most people just called us StewMac, we thought we'd just go ahead and make the change. And-
Tommy Stump: So our volume pot here, we're going to mount it with lugs up and again, I just took off the mounting hardware. There's a locknut that you want to leave on, feed it through the front panel of your chassis, get your flat washer on there and then get your mounting nut. Pretty simple stuff. Now I'm just going to use one of our tools, a multi spanner, pretty handy. I've got tape on the back of mine because they can have burs every once in a while and I don't want to mar this really nice steel chassis that I've got.
Rachel: Can I see that multi spanner when you're done?
Tommy Stump: Yeah. Pretty good tool to have around for an amp tech because bunch of different size nuts and things that it's nice to not have to grab 10 different nut drivers-
Pete: Can we see the tape on the back of that?
Tommy Stump: Yeah. I just put some of our all purpose orange tape on mine. Mod it out, man.
Pete: And to address Freddy's question here, "Is there a guarantee for parts?" Yes, all of our parts, all of our tools, everything we sell has a lifetime warranty. So if there's ever any issue, you can send an email to service@stewmac.com and we'd be happy to fix it right away.
Tommy Stump: Yeah. That's definitely a big part of this amp, is the support that comes with it. Not only maybe the best instructions I've seen, but also the customer support that we offer. Any step along the way you get into a jam, you break something, we're happy to just help you in whatever way we can. So our next step, 14, we're going to install our two rubber grommets.
Step 14: Install two rubber grommets
Pete: And for those of you following along with us, let's just flip page to page 13 now.
Tommy Stump: So these are soft rubber. I like to have the chassis upside down here, so I'm working on this side. Give them a little pinch, feed them right in and they should just feed right down in there and regain their form. That is good to go. That's going to protect the leads coming in and out of the chassis from your output transformer, from getting marred or damaged by this hard, metal chassis. So again, I just got that pinched, pop it through and then I just kind of work it around a little bit until I can see it's grabbed onto the chassis properly.
I'm going to flip it around and you can see that one is not quite there, it's lipped under. I'll just pull that out. And that is that step, so now we're on to the output transformer.
Step 15: Mount the output transformer
So in the same way that your power transformer takes a moderately low voltage, high current signal, most wall voltages have 120 volts in the US, most panels are 15 amp panels, this takes a high voltage signal with a low current and turns it into a low voltage signal with a high current that your speaker needs.
Rachel: Can't that thing.
Tommy Stump: Yeah. So it's much smaller, again, it's only going to put out what your amp can supply, five watts or more or less. So we're going to use our 1/4" 8-32 screws for this. There's a bunch of little screws in this kit and it's good to pay attention and use the right screws for the right job. Again, these are the shortest of our 8/32 screws in this kit and we've got locking nuts for the other side. You see that, Rachel?
Rachel: Mm-hmm.
Tommy Stump: Cool. So I'm going to feed those through the outside. So I've got my output transformer, lines up right on those pre-drilled holes in the chassis. I'm going to get one of those nuts, then I'm just going to start it so it stays in place. Finger tight is fine for now.
Pete: While you're installing that, we've got another question from Thomas Kutch, "Are the jewel lens bulbs 6.3 volt?"
Tommy Stump: Yes. I think they're rated for a range, but they're the #47 pilot lamp, we sell them. And again, so you can see, I'm just finger tightening those and then I'll tighten them the rest of the way down with the screwdriver from the outside. Yeah. So in this kit, the lamp uses the same voltage as the power and preamp tubes for their filaments, their heaters, so it's all going to get wired together.
Pete: And Victory Guitar Shop wants to know, "Is the chassis stainless steel?"
Tommy Stump: It is steel, yep. And now, I'm just going to pull those output transformer leads up through the chassis. I have it upside down from the instructions, just so you can have a little better shot on the camera, but your red and blue go through one of those grommets and the yellow goes through the one further from your power transformer over here. So now we've got it looking a lot like the instructions. So now we're going to mount our speaker output jack. We're onto step 16-
Step 16: Install the speaker output jack
Pete: All right, that's step 16-
Tommy Stump: Yep. So you remember, we mounted the other side of this plug that actually goes to the speaker on episode one. Now, this is the piece that goes in the cabinet that your speaker actually connects to the circuit too. So the mounting nut goes on the outside, everything else on the inside. You'll notice there's mounting holes around this jack. They probably were considering using a different jack at some point for this kit. And they decided to just go with an RCA, which is pretty all right with me. Space is at a premium and a larger jack like a 1/4" jack or something would've taken up a lot more real estate inside the cabinet. So now I've got that mounted, I'm going to make sure that's not too tight because what do I want to do is adjust this tab, which I don't know if you can still see that, Rachel? There's a tab that goes around the outside, that's your ground.
Rachel: Move your fingers [inaudible 00:36:54].
Tommy Stump: Yeah, so that little guy. Like to orient that down toward the bottom of the chassis and I like to have this eyelet facing up on the jack, just makes it easier for me. Not super important that you do that, but it's just something I like to do. Makes life a little bit easier. So I've got that tightened down and I'm going to do the same thing here that I did with the fuse socket and just pull that guy up so I can get to it later, so you can see it's angled up there. Is that a good shot?
Rachel: Yeah.
Tommy Stump: Far out, all right. So we're good there. We're going to get our 5Y3 socket and tension clip next. We're on step 17.
Step 17: 5Y3 tube socket + tension clip
So these tube sockets and tension clips are the same for your 5Y3 and 6V6 tubes. Those are your rectifier and power tubes. So you can see, absolutely the same, no need to worry about which is which when you're installing them. What I like to do, which I forgot, I like to get a Sharpie and mark on the inside of that socket, where pin one is.
These eight pin sockets are essentially the same when you turn them, except for this registration slot here. But when you're inside of it, it's tough to see that. So I like to mark where pin one is and these sockets don't have numbers on the inside, just on the outside, so I like to mark where pin one is on the inside of that socket. Just again, going to make your life a little bit easier. Don't have to do it, it'll just save you a little bit more time towards the end. So now I'm going to get my 4-40 3/8 machine screws, that's a 1/4. These are the narrow screws. There are shorter and longer ones, we're going for the longer ones for this socket. So there we go and again, locking nuts to help stop it from shaking loose when it's vibrating. Was that a good shot, Rachel?
Rachel: Mm-hmm.
Tommy Stump: Okay, cool.
Rachel: And Tommy, just one black wire is kind of hanging out. There we go, perfect.
Pete: Tommy, Victory Guitar Shop, if I'm understanding correctly, is a little surprised that we're using ceramic tube sockets. Is that unusual?
Tommy Stump: Not in a kit like this. We have upgrades for just about everything in this kit, but this is what comes with them and they seem to do just fine.
Pete: Is that for more vintage spec reasons or-
Tommy Stump: Ceramic can sometimes breakdown over time with use. And here I was talking, I'm forgetting what I was doing. So what I just did is not what you want to do. You want to get that tension clip mounted between the screw and the chassis. So I got ahead of myself there. Sorry about that. So again, the socket goes in on the inside of the chassis, the tension clip goes on the outside and then the screw goes through and holds it all together. So yeah, ceramic is just what comes with the kit and there's nothing wrong with it, seems to work just fine. But again, we have upgrades for just about everything in the kit, if you're into that. We sell, believe they're Belton brand octal sockets.
Pete: Can we see what that looks like from the back of the chassis-
Tommy Stump: Yeah. So I finally got it in there. Is that what you mean, Pete?
Pete: That works. I was thinking sort of from the outside so we can see what it looks like [inaudible 00:41:40].
Tommy Stump: Yeah. Once I get it tightened down, I'll show you.
Pete: Great.
Tommy Stump: So I'm going to just tighten that down, so it holds everything in place. Don't need to bear down too far at this point. That socket is not going to go anywhere now and I've got this loose enough that I can move that clip into place, nice and easy.
Pete: Yeah, that's a great shot. That clip, how exactly does that work?
Tommy Stump: So there's a plastic base on power and rectifier tubes, for the most part. And those teeth on that clip, I don't know if you can see those in the shot, there's two little teeth on each side of this clip, that just hold it in place with friction. Just a little bit more tension, because these things rattle, especially when you're playing low notes, things like that. And it'll just hold your tubes in place, during transportation as well. All right, so that is done. We're going to go ahead and do the 6V6, same exact process. I'm going to mark that again.
Step 18: 6V6 tube socket + tension clip
Pete: And so you mentioned 5Y3 was the first socket, this one is a 6V6. I'm sure that there so much information that we could get into on these different types of tubes, but is there any kind of simple or concise rundown? Any information we should know about the tubes?
Tommy Stump: Well, back in the day when tubes were everywhere, they were in every kind of electronic thing you could think of, from radios to televisions, to all sorts of stuff. There were a lot more tubes out there, a lot more reasons to use tubes, a lot more varieties of tubes being produced, so there were different systems for naming them. There's the US R-E-M-T-A system, which is the most common still for US where the first digit is your heater voltage. So a 5Y3 tube takes five volts for its filament or it's heater. A 6V6 tube takes six volts.
The subsequent digits letters and numbers were all for essentially what the tube is designed to do. Whether it's a power amplifier or a signal amplifier, there's different numbers and letters for say, gain. 12AX7 has a gain factor of 100. 12AT7 has a gain factor of 60. Tons of really important information for back in the day when you were designing things like this on a regular basis for use in people's houses. Nowadays, there are a handful of the most popular and most widely used tube styles, so a lot of those are lost to the ages, essentially.
Pete: All right. I apologize, I'm sure I'm going to butcher this name, but Wojciech asks, "Do I need to measure B+ voltage?"
Tommy Stump: Not until you get your tubes in, but eventually yes, we will be measuring your B+ voltage. B+ is an old designation, came from batteries, battery plus, and that is your high DC voltage that powers the circuit.
Step 19: 12AX7 tube socket
So we're going to mount our 12AX7 socket, which you can see that's quite different. It's got nine pins, so marking it isn't as important. And it does have the numbers on the inside and our two 4-40 1/4" and this goes from the outside. And again, we want our gap there to be facing the corner or the side panel of the circuit, not facing the open side, so I've got that lined up the way I want it.
Susan: What does that mean? Can you tell me that one more time? [inaudible 00:46:26].
Tommy Stump: The nine pins have an open side, there's one gap and we want that to be facing the wall of the chassis, not the rest of the circuit, just so it matches up with our instructions. And again, if you're an experienced builder, you can deviate however you want from our instructions. You can do things in whatever order you want. We just find, for the most part, these instructions give you the best order of operations to have a fun and successful build. So again, I just got that finger tight. I'm going to get the other one in and I'll go and tighten them at the end.
Pete: All right, we got another good question here from Bigsby77X, "As a tube noob, the gain factor decides the headroom?" Is that correct?"
Tommy Stump: No. So a lower gain factor, if you want to boil it down, gives you more headroom. Gain is a scientific thing and also a tag phrase, a high gain amp has a lot of breakup. So a 12AX7 has the most gain available of any of this family of tubes. If you wanted more headroom, you could go to a lower gain tube like a 12AT7 in this circuit and stay clean, much further into the volume sweep. Not really what this amp was designed for though, so it's not a very common mod, but something you can easily do and undo. So now we are onto step 20.
Pete: All right, moving right along.
Step 20: Install two jacks + 1M resistor
Tommy Stump: So we've got our two jacks. They're the same, they're both 1/4" shunting jacks. So that third connection outside of your signal and ground or tip and sleeve is going to be used to silence the circuit when nothing is plugged in. So it seems complicated, but the instructions are very simple and clear about how it's going to all work. Now, what I like to do is get a helping hands because there's going to be some fancy wiring going on at this stage with our one meg resistor. So I'm going to have my little alligator arms here, hold that for me. I'm going to grab my one meg resistor.
You're going to get really used to reading resistor codes. They're all color coded, so one meg, brown for one, black for zero, green for the order of magnitude that gets you to one million. And again, that last band is always going to be gold for these small carbon composite resistors. So for jack one, we're going to wire this one meg resistor between these lugs, that's your ground and your tip. That's going to set your input impedance which is going to make this jack louder than jack two. Really common back in the day to have multiple things plugged into one amp through the '50s. So this would make it so that this input would be louder than the other one, so in case you had a vocal mic and a guitar, you could pick which one is louder.
Pete: [Inaudible 00:50:03].
Tommy Stump: Go ahead, Pete.
Pete: I was going to say, can you show us each kind of step of this process, like pull your hands away and make sure we've got a nice, clear view?
Tommy Stump: Doesn't matter which way, these aren't polarized, resistors generally don't have a polarity. I've got one leg through each of these tabs and I'm bending them so it stays in place. I also want to make sure the body of that is out of the way so when my plug comes in, it's not going to push that. So I'm going to give it a little bit of slack there and push it up out of the way. And then what I'm going to do is wire that through this middle tab. You can use a bending pliers, you can use your fingers, you can do whatever you like to do. That's a cutter, that'd have been close. I'm going to bend that. That lead is fairly flexible. Sorry, you can't really see that, Rachel.
Rachel: [inaudible 00:51:05] see it in a second.
Tommy Stump: Yeah. So there, I've got it pulled through. And what we're going to do is hook that on to the other jack. We're actually going to hook this tip lead onto the other jack. So I've got this guy done. I'm going to just wrap that up so it stays in place and then for my other jack, I want this lead that we have coming off of our tip connection, to go here, to the middle tab on this other one. I'm going to bend that into place as well and then what we'll do is mount these guys into the chassis. I like to do that wiring outside of the chassis just so it's not as cramped. Maybe the most frustrating part of building this amp is just the size of the chassis. So anything you can do to give yourself a little break from frustration and make it easier on yourself, I do recommend.
Pete: And if you're following along in the instructions, there are going to be a few steps today where we don't actually solder the connections, we're just looping the leads through or in this case, the resistors' leads and that's called wrapping the leads. So you'll notice in the instructions, it's pictured where they're just wrapped for now. There's a little bit of that lead still sticking out of the eyelet, as opposed to soldered in place like the ground on this volume pot, is just a little blob. You don't see any of the excess leads sticking off.
Tommy Stump: Right. And I'll do my best to tell you when to solder things. For today's episode, there's only a few things that actually get soldered. There are some that you can solder or not. I like to solder them if I'm done with them. The instructions do a pretty good job of telling you when not to solder things. There's some instances where you could go ahead if you want. Not the end of the world, as long as at the end of the day, everything is connected. So you can see I've got those mounted. They're finger tight, they're wired properly. Not soldered because we're going to add a couple wires, but that is good to go for now.
Pete: All right, moving right along here. Wow, onto step 21 already, so this will be the end of page 13 and then onto page 14.
Step 21: Install power transformer leads
While we're getting prepared to install the power transformer leads, there were some other questions here. They're actually rolling in pretty quick, so we'll try and keep up with everyone. Wojciech asks, "Do you think that hand wired amps sound better than PCB or that the capacitors from the '50s, like Astrons, sound better than the new ones available today?" I guess, what is your opinion on that?
Tommy Stump: Well, just to explain what I'm doing while we start getting into questions, I'm taking my power transformer primary leads, taking the white one to my fuse socket and taking the black one down to my power or my power switch and volume control. I'm just cutting those to length. So there is no end of debate online about whether old stuff sounds better than new stuff, whether hand wired sounds better than PCB. For me, PCB stuff is easier to work on and therefore easier to upgrade... I mean, I'm sorry, hand wired, point-to-point is easier to work on and easier to upgrade, but there are PCB amps that sound great. So the there's no harm in experimenting and looking for ways to improve your tone, but just having a better hand wired amplifier isn't going to magically make you a better player or anything like that.
As far as the actual sound of them, I know people who have said that in a blind test, they couldn't tell the difference between a new say, Fender Champ and one from the '50s. So again, a lot of that is in your ears, it's subjective and like Duke Ellington said, "If it sounds good, it is good," these amps sound good. So I'm going to go ahead and solder those. You can see I wired this so the leads are back up against the front panel, out of the way and away from where all my actual signal is going to be running where hum could be introduced. Down to the end of my little solder pocket pack. So again, doesn't matter which one you do first, just make sure you get a good joint. So I've got my black lead here and my white lead going to the fuse.
Rachel: [inaudible 00:56:21] left hand [inaudible 00:56:22].
Tommy Stump: Yeah, we do this. Is that better?
Rachel: Mm-hmm.
Pete: All right. And again, a good mechanical connection makes a good electrical connection.
Tommy Stump: Yep. So that's why I like to bend those over and then once they're good, you give that a little tug, I can go ahead and clip that extra lead off. For the fuse, you can just press that guy down, no big deal on that. So that is done, what's next, Pete?
Step 22: Terminate unused power transformer leads
Pete: Moving right along, we are on page 14, step 22, terminate unused power transformer leads.
Tommy Stump: Right, so now that we're done with our actual primaries, we want to get our other ones out of the way and done with so we don't have to think about them. Now, I like to keep this at this proper length in case I ever want to hook this up at a different voltage, so I like to kind of mock up the same length and then cut it. Doesn't have to be perfect, doesn't have to be exact at all, but I'm just going to pop those off at what I think is a good length. Toss those, remember to try to keep a tidy bench if you can. Mine is kind of getting a little frazzled here.
Pete: Tommy, we've got no shortage of questions here today, which is a good thing-
Tommy Stump: Let her rip. I'm just going to tell you what I'm going to do and then we can answer questions while I do it. I'm going to pull these jackets on these wires up, so it comes over the conductor, just a little extra security. And then I'm going to put heat shrink on each one, I'm going to melt that heat shrink with a lighter and then I'm going to pinch the ends while it's still warm so they crimp up on it.
Pete: Great. And while you're working on that, Benjamin Marn asks, well he says, "I know that the original Tweed amps had the fiber board eyelets... or the eyelet boards dipped in wax." He thinks a potting wax composed of microcrystalline wax or paraffin, "Is there any benefit to this?"
Tommy Stump: That may have been for microphonics or I'm not sure 100%. I guess there have been reports of these being slightly conductive, the fiber boards because they bake carbon into it. But as far as waxing them, it certainly isn't vital at this stage and it seems like it would just kind of be a mess. It's a interesting question though, it's something to read up on later.
Pete: Yeah. Really, my experience with potting would just be wax potting pickups, like you said, to prevent microphonic feedback, but did not know that the boards could have been wax potted as well.
Tommy Stump: We'll get back to you on that one. So you can see I'm just feeding this heat shrink on here, halfway up the lead or halfway down the heat shrink and then heating it up. It's going to shrink to about half its size and then after a couple seconds, you can pinch it and it'll stay shut like that. All right. That wasn't an abundance, Pete. I was promised an abundance-
Pete: Oh. Well, I've got more. Here's a little more of a personal question. Victory Guitar Shop says, "I went to New England Tech for electronics. Where did you learn about tubes?"
Tommy Stump: Working on tube amps, so my first job out of college, I did a ton of soldering and wiring of big audio visual racks. So just real quick, those are all twisted, I tucked them down in the corner here. They're not going anywhere. If you want, you could tape them together, but those are essentially out of sight, out of mind for the rest of our build. Super important that you do it properly though. You don't want those flapping around inside of your circuit.
Step 23: Power transformer green leads
So then back to that question, as we move on to our next step, our green transformer leads, we're going to move this to the end, but I can twist them and get them to the right length now. If you want to install them now you can, into your pilot lamp socket. Twist these for tidiness and hum cancellation. This is going to carry 6.3 volts, your heater [inaudible 01:01:00] for your pilot lamp.
So like I said, I had a job out of college where I was doing a ton of wiring, ton of soldering and understood the difference between balanced and unbalanced audio. And when I was in school, I went to school for music recording, so we had to take an electronics class and electrical engineering class. But I didn't really know how tubes worked, I was aware of them. And then I bought an old tube amp and just started, trying to figure out how it worked and how to fix it. Ended up reading a ton about how tubes work [inaudible 01:01:44] out there. Rob Robinette's website is an absolute gift to anybody who wants to get more into tube amplifiers.
There's a couple great books. Gerald Weber has a good book, Tom Mitchell has a good book. We sell the Mitchell book about how tube amps work and how to service them yourself. Most of my experience and most of my learning was either fixing my or my friends' equipment or just reading and working on just learning how the actual things work. So I'm going to go ahead and strip these back and leave them until my socket is in there. These are not tinned, so I like to give them a good twist to keep them all together. So I'm just going to leave that off to the side for now. What's our next step?
Step 24: Power transformer red/yellow lead
Pete: Our next step, the power transformer, red, yellow lead.
Tommy Stump: Yeah. So this might be a tough shot for you, Rachel, could spin it like that, I suppose. Can you see that back there?
Rachel: Yes.
Tommy Stump: Okay. So we've got our three red leads, one of these is our center tap for our high voltage output. It's essentially a ground, we're going to attach it to ground. So it needs to just go to that grounding terminal strip in the back corner. It's not a long run, but it's a very important one. Strip that back. There's no perfect length of wire you should strip back. I just go what feels right and then you can trim any excess. So I'm going to feed that into that center lug of my terminal strip.
Rachel: [inaudible 01:03:48].
Tommy Stump: Yeah. Can you see that? Yep.
Rachel: Yep.
Tommy Stump: And then I'm just going to go ahead and solder that. Some of these, we're not going to solder till the end because there's more stuff going on there. But for this guy, which I don't know if you can see that overhead, but we're going to see a lot of soldering. [inaudible 01:04:09].
Pete: I know that you had mentioned the green wire coming off the power transformer was stranded. Are all of the leads, stranded wire or is that solid core?
Tommy Stump: All of the leads from your power and output transformers are stranded, some of them are pre-tinned. This one is pre-tinned, so it's going to hold its shape and coil really well. The ones that aren't stranded are your heater wires, so your green pair and your yellow pair. Your yellow pair are what delivers the heater voltage to your 5Y3 five volts. And I believe those might be next.
Pete: I think we're doing the red leads first.
Tommy Stump: Yeah, you're right.
Pete: Yeah. While we're getting ready for that, we again, still have plenty of questions and thank you folks. That's why we're doing this live, it's so we can answer your questions on air. This makes our job a lot easier if you've got questions. So Hollow... excuse me, Hollow Matrix says, "Can I ask, if you want to learn electronics and component repair, any ideas where to start? And what's your opinion on cryogenic tubes?"
Tommy Stump: I'm not sure I'm very familiar with cryogenic tubes, but if you want to learn, pick up broken stuff at a local flea market junk store and try to fix it. Really getting into it is a big thing. Kits like this are a great way to learn as well, our pedal kits, these amp kits, it's all going to teach you about soldering. And you're going to definitely think up questions along the way that they're just going to make you need to go research it. And then again, there's a ton of great information out there about all this stuff and it's just knowing where to find it.
So another good thing you could do is try to find a mentor. Having someone work with you is a lot less daunting, especially when we're talking about 700 volts right at your fingertips, which is what this connection is. This is our high voltage or high tension connection from our secondary. This is what's going to supply the high AC voltage to our rectifier two, which is going to then turn it into DC voltage which the rest of the circuit needs to work. So I'm going to twist those good and tight and then I'm going to strip them off and those leads go to pins four and six of your rectifier tube.
Pete: And Hollow Matrix, Victory Guitar Shop again makes a great point, to be careful if you're picking up old amp stuff to repair to learn on. Again, make sure you bleed the capacitors, all the safety tips we discussed earlier in this episode and in episode one as well. And then as far as soldering, we have plenty of great soldering tips. Actually on page 16, there are some really great soldering tips in these instructions. We also go over, in a little more detail, some of these soldering tips in episode one of a pedal build series we did that is also still up on our YouTube channel.
Tommy Stump: Right on. So definitely, if you're working on any tube or radio or whatever with filter caps, which most of them do if they have amplification going on, you need to know how to drain those caps because they can store voltage even after weeks, months of being unplugged. So I've got my red leads, doesn't matter which one goes where, going to-
Rachel: [inaudible 01:07:56].
Step 25: Power transformer red leads
Tommy Stump: ... going to four and six. I haven't wrapped this one yet because I'm just going to get four in there so it stays in place. I'm going to solder this because there's nothing else going to this pin, even though the instructions don't say to. I'll just like to get it either way.
Pete: Those are also some interesting looking pins.
Tommy Stump: Yeah. So they have two eyelets which makes it really good if you've got to do multiple connections. You can still go right ahead and get those in there. So that one is good to go. And then I'm going to bend my other guy in here. These are pre-tinned, so you don't need to worry about them losing their shape or whatnot. I'm going to still bend that, so it makes a good mechanical connection. And solder away. Am I blocking you?
Rachel: Just a little bit with your left hand.
Tommy Stump: There we go. So we are good to go on the red leads. Yellow leads are next, right Pete?
Pete: Yes, absolutely. Yeah, moving on to step 26 on page 15 now. We're going to go ahead and install the transformer's yellow leads.
Step 26: Power tranformer yellow leads
Tommy Stump: Yeah. So again, you're going to want to twist these, this is your five volt tap. This is what supplies your rectifier tube with its heater voltage. We're getting close here folks. We're almost done with this episode.
Pete: Yeah. And I know you've mentioned in the past that the number of wraps aren't really so crucial on this side of the transformer, but what does twisting the leads accomplish?
Tommy Stump: So it's hum cancellation, essentially. AC can introduce hum just environmentally and twisting them helps add some hum cancellation, similar to phase. And again, like Pete was just saying, this side of the chassis, there's not going to be signal over here, so you don't need to be as cautious or diligent about your twisting over here. But once we get to this portion of the chassis, you're going to have AC and your signal all bouncing around together, so you really need to be careful about how you wire your amp. We call that lead dressing and we'll talk about it ad nauseum, probably in episode four.
But for now, I'm going to go ahead and strip these. Again, these heaters are not tined so I like to twist them up real good. Make sure they don't splay out and get all frayed and nasty. So just some good twists with your fingers. We'll get those all coiled up together and those go to pins eight and two. So again, I've got my one marking there, so I know I've got two and eight over here. Again, does not matter one lick which one goes where. I'm going to go in the bottom hole on eight especially because we need to add another lead up here, but I can go ahead and solder it since I've got those multiple eyelets on that pin
Pete: Hey Tommy, for those following along at home, which hole on your wire strippers are you using? What gauge wire is this?
Tommy Stump: I used 20 and I believe that is for braided, not solid. So again, I just be sure that you're not going too crazy, too small. 20 is the perfect size for these heaters for sure. And the jackets on all these primary conductors are pretty thick, so it's pretty easy to strip them off even with a bigger gauge on your strippers.
Pete: Here's an interesting question for you, Oscillation Overdrive-
Tommy Stump: Can you see that, Rachel?
Rachel: Mm-hmm.
Tommy Stump: ... Oscillation Overdrive asks-
Rachel: [inaudible 01:12:27].
Pete: ... if all possible wiring is changed to shielded cable, will this reduce hum noise in the system? And my follow-up is, what complications could that introduce if...
Tommy Stump: I guess there's no harm in it, but you need to be careful about your grounding scheme. A simpler grounding scheme is generally better. With all those extra shields, you need to be careful that you're not creating any shorts. Essentially, it's just more complicated than it needs to be. You can build a dead quiet amp like this using vintage pushback wire if you follow the tips and tricks in our instructions and that, I'll go through later in this series.
Pete: All right. And another good one from Thomas Kutch, "Any tips on what components can or can't be close together to prevent oscillation?"
Tommy Stump: The big ones so far are that your transformers need to be mounted asymmetrically. Essentially, this one is turned on its side and this one is on its end. That's a big one, those can interfere. We'll talk later in the series about AC and how it can interfere with your audio signal and we'll talk about the most important leads that carry the highest potential for introducing noise. But essentially, in this really simple circuit, there's not a whole lot that can go wrong if you just follow the tips, especially for your heater connections. So we are good with that step. Now we're onto the output transformer leads.
Step 27: Output transformer blue lead
So our blue lead is first in the instructions. It's going to pin three of V2. We call these V1, V2 and V3, valve, V for valve. Is what they used to call. So I've got pin one, two and three, I'm going to get that to the right length, I'm going to give it a little extra so I can dress it if I need to and clip it off. This guy out of way. Strip it back. Cutting these to length helps keep your circuit tidy. In general, in audio, tidy is better. A messy circuit will often have more potential for noise, shorts, you name it. So I've got that bent in there so it's going to hold its place. We're not going to solder that yet.
Now, we're going to move on to our yellow lead from our output transformer which goes to our speaker jack
Step 28: Output transformer yellow lead
Pete: Yeah, just a couple steps left in this episode.
Tommy Stump: Yep. So I've got this wired pretty much straight on, got my length. And I'm going to strip that guy back. Here we go, I stripped that one pretty short. I'm going to go ahead and just get a little bit more so I can actually wrap it. We're also not going to solder this connection because we have to add one more lead to our speaker jack. You guys are just being stubborn.
Pete: Hey, Tommy, here's a interesting question that I had missed before from Dr. Buzz Lightyear Acetone. Man, some of these names [inaudible 01:16:21]. You guys are awesome. Sounds like he has some experience with these amps or at least Fender amps. He says, "Will you miswire the tube heater filaments like Fender does?"
Tommy Stump: No. We're-
Pete: Can you elaborate on what he's referring to?
Tommy Stump: So I think what he's talking about is there have been some issues with Fender amps over the years where they were maybe just following the RCA tube datasheets and not really paying attention to what it actually should be wired as. But again, that's a really interesting question and something I'm going to look into more. The way we wire these, it absolutely works, so we're going to stick with our instructions. But again, feedback like that is super interesting and sends me on another hunt to find the answer to what he's actually talking about.
Susan: Is there a way you just put that yellow wire?
Tommy Stump: Yeah. So I put that yellow wire onto the center lug of our speaker jack here and again, we're not going to solder that one because there's another lead that's going to connect here. So for now, we've just got our red lead that we're not going to deal with today and our black lead is wrapped and our yellow lead is wrapped. We're ready to move on.
Pete: Yeah, we're going to ground the volume pot now [inaudible 01:17:49].
Step 29: Ground the volume pot
Tommy Stump: Yeah. So if you remember, we prepped that grounding strip and we've got our volume pot, we're going to go ahead and add that connection. It's a very important connection. We're going to use our green pushback wire. I believe it says, "Cut a three inch piece," so I've got my ruler here. Really good, especially for the green leads, that you follow these length recommendations. It comes with just about exactly the right amount of green wire. Last time I built one of these, I believe I had like three inches of green left maybe and I was pretty diligent about going short when I knew I could get away with it. So for this ground connection, you're going to leave the insulation on it. I'm going to bend that over and feed that through that volume pot. Can you see, Rachel?
Rachel: Your hand is a little bit in the way [inaudible 01:18:47] let's see once you move over [inaudible 01:18:48].
Pete: And while Tommy gets this jumper in place, to answer Victory Guitar Shop's question, is this the simplest kit we sell? Yes, this is the simplest. It is a little tight in the chassis, so it's not worry free. That's really the most difficult part of this build, is getting everything in place and getting your hands in there. But we did decide to select this amp kit for a live build along because it's a great introduction into amp building.
Tommy Stump: For sure. Again, it's got the least components. I don't know if I can really think of a simpler tube amp circuit. I'm sure they're out there, but this is the granddaddy of all simple amps. So again, I've got my volume side soldered, I'm going to go ahead and solder the terminal strip as well.
Rachel: [inaudible 01:19:46].
Tommy Stump: I'm just going to give that a little tug test, good there. So you can see, it's still nice and tidy and we are good on that step. Now our last step that we saved for last, just for simplicity and ease of installation, is this pilot socket.
Pete: Right, moving to step 12 to step 30. A little nice pro tip.
Tommy Stump: And again, that's just so you can access this, what we just did. If you install this socket at the beginning like the instructions say, you can still get it, but you can see once I get this installed that it can be a bear to get in there. So if you save that step for after you ground your volume pot, and I'm sorry there's no good shot of that, this won't be in your way. And again, we recommend that you put this socket mounted kind of horizontally like that. So we're going to tighten that guy down and then what you could do to fully tighten this guy is hold it on the inside and screw in your lens on the outside, which will thread in and then catch and help you tighten that fully.
Again, it's got to locknut on there, so it'll be good to go and we can just leave that as is for now. And then the final step today is wrapping those green leads carrying the 6.3 volts for our tube heaters and also the voltage for our lamp socket. Doesn't matter which because it's AC and we're just going to wrap those through. Now, we're not going to solder these because there are a few more connections that get made at this socket, so we're just going to bend those over. I don't know if you can see that, Rachel, but I just bent that around that tab. I'm just going to do the same thing on the upper. Of course, I pulled it out though.
Pete: And while you're getting those in place, Tommy, Kevin Oldman has a good question. "Are common mods listed in the kit?" I'm assuming instructions.
Tommy Stump: They're not, but we have kind of tossed around the idea of doing maybe another episode in the future about mods, upgrades and the like. And if that's something you guys are interested in, we could have a really nerdy conversation about how the stuff actually works, how those different mods affect your tone and your gain and breakup and things like that. So do let us know that in the comments and maybe that's something we'll work on.
Pete: Yeah, absolutely. If there's something you guys would like to see us build or discuss, we'd love to hear from you about it. And that way we can really consider what people are interested in learning in, for sure. Hopefully put out more of these videos for you.
Step 30: Inspect and double-check
Tommy Stump: Heck yeah. So step 30, inspect and double check your work. This is as important as anything we've done so far. You want to go back and visually inspect, double check, cross reference against your instructions to make sure everything is in the right place. The part of the circuit that we just did, especially the power transformer, is absolutely crucial. And you're working with high voltage, so you can cause some damage if you don't do this right. So it's really, really important that you just go back and give it another glance to make sure everything is where it should be, you didn't miss any solder joints that you should have made and that you're ready to move on. And for our purposes, that means next week because we are done with this episode.
Pete: Yeah. That wraps it up for today. I want to say a big thank you again to Tommy Stumpp for leading us through all this.
Tommy Stump: Not a problem, happy to do it.
Pete: And Rachel.
Rachel: [inaudible 01:24:15].
Pete: And Susan and-
Susan: What's up for next week?
Pete: Up next week, join us again for episode three of this live build. We'll be here for three more episodes, so Monday, December 7th, 3:00 PM Eastern. And we're going to be populating the eyelet boards, right?
Tommy Stump: Yeah. So we're going to move on to the actual audio portion of the circuit which is where the eyelet boards come in. That's going to be a really fun one and we're going to talk a little bit about what each component does too.
Pete: And as always, we will keep an eye on this video, so if there's anything that we went over in this episode that you have a question on, please go ahead and leave a comment with your question and we'd be happy to address it at the beginning of episode three. I think that wraps it up for today, so thanks everyone for joining us and we'll see you next episode.
Tommy Stump: For sure. Thank you, Pete. See you, everybody.
Pete: Have a good night.


