Radius-sanding Beam
V-5640
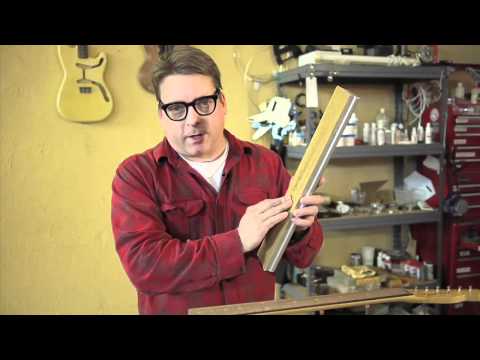
Erick Coleman using a Radius Beam on a fret job for leveling the board, then the frets.
Video Transcription
[Erick Coleman - Stewart-MacDonald]
Level a factory fretboard
Erick Coleman: These Aluminum Sanding Beams are one of my favorites. I'm refretting this Telecaster, and its fretboard has a 9-1/2 inch radius. The frets have been pulled, and I'm using a matching beam to level the board. I'm using 220-grit Stikit Sandpaper for the job. We'll often see brand new guitars with a slightly different fretboard radius than what the manufacturer specified. This could be caused by a number of things during production, including worn cutting heads and clogged up sandpapers. The radius on these sanding beams will trail up any variations that might have been in the fretboard when it left the factory.
My customer asked me to use Hide Glue for this refret job. That means I'll have to leave these under clamps until the glue cures. For that, I'm using a radius beam as a clamping claw. They're clamped up nice and tight. Now I'll need to let them dry overnight. In the morning, I'm going to use the same leveling beam to level the fret tops using 320-grit sandpaper, should only take a few passes to get them nice and level. Using the same tool to level the board, clamp the frets, then again to level the frets, gives me the most consistently accurate fretwork I've ever had.
Radius a new custom fretboard
I'll also use these sanding beams to put a radius on a new fretboard before fretting it. Sometimes I'll warm them up to remove fretboards. They conduct heat well and that helps soften the glue between the fretboard and the neck. I'll also cut them down into shorter lengths for special purposes, such as fretting, shorter necks or installing inlays. These sanding beams are really worth the investment. They last forever, and I use them all the time.


