Preparing a guitar for a professional recording date
What to do before recording

Getting a guitar ready for a professional recording date
If you ask me, Rontrose Heathman is one of America’s greatest living guitarists. Ron’s about to record a new album, and he sent me his Les Paul to get it ready for the studio.
In over 20 years as guitarist for the Supersuckers, Ron Heathman has put good ol’ rock & roll in the spotlight. Do yourself a favor and check out their latest LP, Get It Together to hear some of his finest playing to date.

These days Ron has joined up with LA legends the Hangmen, who are getting ready to hit the studio to record a new album with Mike Ness at the helm.
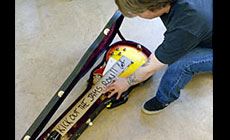
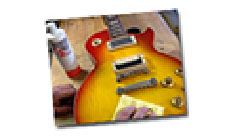
Ron’s guitar is a Les Paul 1958 Reissue made specifically for him in 2005 by the Gibson Custom Shop. To prepare for his studio date, he sent it here to have me give it the business — a whole bunch of little jobs that add up to one awesome playing instrument.
1. For starters, play the guitar.
Evaluate it by playing awhile. Eyeball the neck: is it straight? What shape is the hardware in? Listen for rattling frets, etc. Ron’s guitar plays pretty well, considering it’s seen hundreds of gigs since its last trip to the shop.

2. Lube and adjust the truss rod.
This Les Paul’s neck had a little more relief (slight upbow) than I like to see, so my first step was to straighten it. I removed the truss rod nut to clean and lubricate that before making adjustments to get the neck straight.
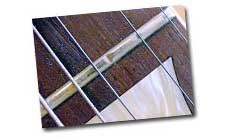
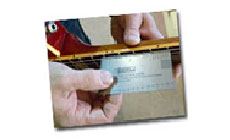
3. Fret check.
After straightening the neck I played the guitar a little more to get a better idea of the condition of the frets. Ron is quite the string bender, and the wear on his frets show it. Here's a closeup of the notch worn into the 3rd fret under the G-string.
Hmm... What are my options here? I could level the frets until the worn spots are gone, or go all-out and refret the entire fretboard.
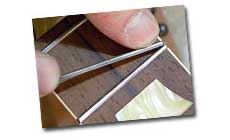
4. No getting around it: refret time.
The wear on the frets was so severe that if I were to level the material down to match the worn areas, the frets would end up being only around .030" tall — after leveling almost .015" off of the tops! That’s way too low for Ron’s kind of playing, so my question is answered: the guitar needs to be refretted. I refretted it in the neck jig, using 0152 fretwire and fresh hot hide glue.

The frets went in nicely, needing very little leveling and crowning. Here, I’m dressing the fret ends, and that went quickly too. I love it when a job goes this smoothly!
Hot Tip!
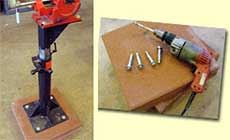
My ShopStand isn’t mounted to the floor.
I use the ShopStand every day, but not always in the same spot. It’s designed to mount on the floor, but that doesn’t suit my workflow. I’ll need it over here today, and over there tomorrow. So I mounted it on a base I can move around.
I made this from two 16” patio blocks stacked together. Masonry anchors connect them. We’ve put this tip in the ShopStand instructions online: learn more
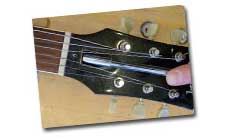
5. A new nut.
When I was done with the refret, I replaced the stock plastic nut with one made of vintage bone for better tone. It’ll last longer than plastic, too.

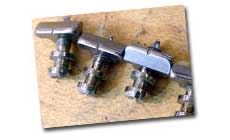
6. Tend to the saddles.
Once the glue holding the new nut was dry I adjusted the bridge saddle heights so the strings follow the curve of the fretboard radius.
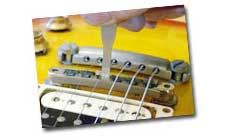
I used abrasive cord to dress out the saddles until they’re nice and smooth — using it like dental floss to polish the string notches.
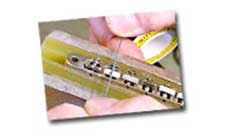
I want the saddles to be as smooth as the examples in Dan Erlewine’s book, How to Make Your Electric Guitar Play Great! (But why stop at great? This guitar will play fantastic!)
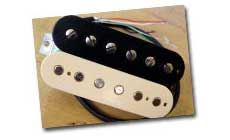
7. Custom pickup.
After a long talk with Ron about tone, we decided a new bridge position humbucker was in order. I custom-wound a humbucker kit to slightly hotter than vintage specs. At Ron’s request, I didn’t wax-pot it. It’ll have the untamed sound of really early pickups (none of the old Gibson pickups were potted).
I adjusted the polepiece heights to follow the radius of the bridge and fretboard.
8. Clean the innards.
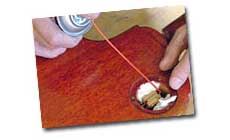
I cleaned the contacts on all the pots and switches,

stuffing bits of paper towel between the components to absorb any excess spray.

9. Wrap it up.
A few last details: I used my nutdriver and screwdriver sets and the toggle switch wrench to tighten any loose nuts or screws on the pots, tuners and switch. I cleaned and polished the guitar before stringing it up.
Final setup
includes checking the action at the 12th fret, adjusting the pickup heights and setting the intonation.

Ron’s guitar is ready to lay down tracks in the studio. Another quick once-over with a polishing cloth and I’m packing this one for shipping.
Thanks much for sending this one my way, Ron. I’ll look for my name in your album credits!