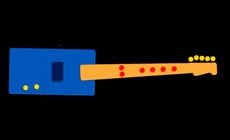
The simplest custom build ever?
Here's the plan!
This sure was an easy one!
I just received this build request from Johnny Revers, guitarist from the band Sparkle Teaser: "a board with a single pickup, like a Les Paul Junior, but with a bolt on neck".
Such a goofy body shape makes a good point for this Trade Secret: no matter what shape body you build, you'll need to follow these steps to lay out the guitar.
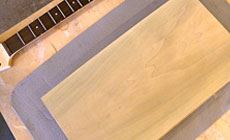
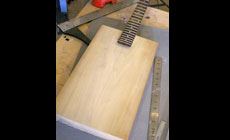
I grabbed a nice piece of Poplar and got started. This piece measured 9-1/2" x 17" x 1-7/8" — not usual for a guitar body blank, but just right for this plank of a guitar.
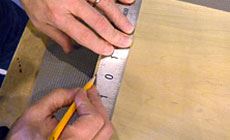
Mark the centerline
All of the routs and parts placement will be based off of this line. Use a pencil, but don't press too hard. You don't want to put a groove in the wood.
Rout the neck pocket
By routing the pocket first, I can temporarily attach the neck for determining proper pickup and bridge placement.
In the photos below, I'm setting up the neck template and I'm placing the neck bolt holes.

For details on routing neck pockets check out our video online.
And also see our free info article on mounting bolt-on necks.
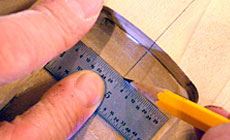
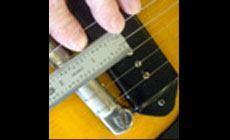
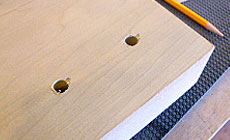
Locate the bridge
With the neck attached, I laid out the proper bridge location. To find the right spot, I used our online fret scale calculator.
I took the neck off and drilled holes for the bridge, keeping everything lined up with the center line.
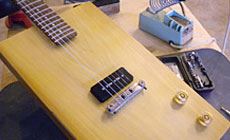
Locate the pickups
For pickup placement I referred to a 1955 Gibson Les Paul Junior. I copied the distance between the the center of the polepieces to the center of the bridge, measuring at the middle. The pickup was around 1-1/2" in front of the bridge.
I then marked out the location on the body, attached a P-90 template and routed for the pickup.
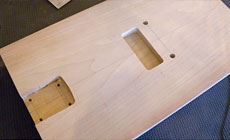
It's starting to look something like a guitar at this stage. The neck pocket and pickup routs are complete and the blank has been drilled for a bridge. Now it's time to drill and rout for the control cavity.

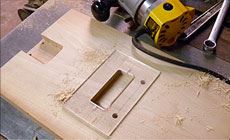
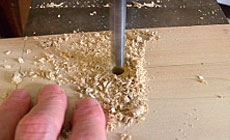
Drill for the control pots
Again, I used the '55 Junior to determine the location for the control pots. With a 3/8" bit I drilled the potentiometer holes through the entire thickness of the body blank. Drilling these holes first makes it easier to center and line up the cavity templates on the back of the body.
Custom cavity shape
For the control routs I had to make a couple of custom templates using our blank template material. One template is for the control cavity rout, the other is for the recess that will hold the coverplate.
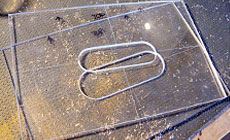

I made these using drill bits, a coping saw and files. Nothing fancy, just like I did in Trade Secrets #128.
I then located the centerline for the potentiometer holes and routed for the cavity and coverplate recess.
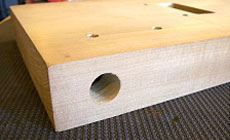
A quick date with a 7/8" Forstner bit drilled out the hole for the jack. I connected the pickup rout to the control cavity by drilling at a shallow angle with a 1/4" aircraft bit. We're almost there!
Body shaping
I rounded the edges of the guitar with a 1/4" roundover bit. On the back, I rounded all the way around, but on the top I only rounded where the player's arm will rest. This keeps the board-like look of the build, but won't rub Johnny's arm raw when he plays it.

Sanding this out to 220 before finishing went very quickly. A half dozen coats of satin aerosol lacquer was all this guitar needed. I let it cure for about a week before assembling the guitar.
I delivered The Plank at the venue, and Johnny took it straight to the stage — exactly what he wanted!