Binding repair on a '55 Gretsch Roundup
Issue 188 April 11, 2013
A truss rod fix leads to a binding repair: Dan Erlewine has to remove the fingerboard from this great old cowboy guitar, and some of the red side dots disappear. He shows two techniques for replacing them.
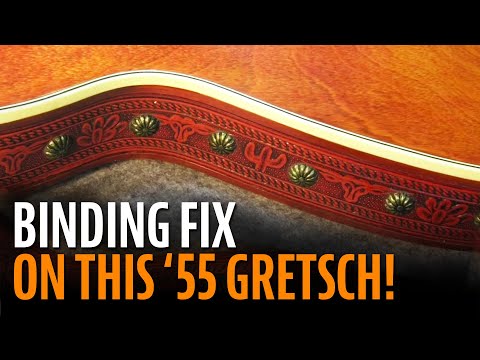
- 1955 Gretsch Roundup with tooled leather accents
- Heating and stretching old binding
- Working clean with messy hide glue
- Hot Tip! The red artist's pencil
- Mixing color into epoxy: a little goes a long way!
Video Transcription
[on-screen text reads: Dan Erlewine - Stewart-MacDonald]
Dan Erlewine: I had to fix the truss rod in a '55 Gretsch Roundup, one of my favorite guitars, the cowboy guitar with the branded top and tooled leather sides. It even has a guitar strap that's tooled leather like a cowboy belt with the jeweled buckle on it. I got the fingerboard off to access the truss rod, which had rusted in place, but before I could remove that, I had to take the inlays out of the fingerboard first because they're engraved celluloid. I took them out with hot water and heat and it took a while. Once I got the board off, I fixed the truss rod and then had to put the fingerboard back on.
Making a gluing block
When the fingerboard came off, the binding fell off. That's pretty typical. Now I'm making a gluing block to put the board and the binding back together. Just a hunk of wood with Double Stick Tape on it and wax paper to keep the glue from sticking to the board and the binding to my block.
I'm going to put the fingerboard right up to the edge of the block as if it was a guitar neck, like I was gluing it on there and binding it in place. Back in the fifties, a lot of this work was done by hand. Those side dot holes are drilled pretty out of square. I cleaned up the old binding by drawing it over the sharp piece of this snap file [on-screen text reads: Sharp files snap into place - Snapfile Leveling System Complete Set]. This isn't the actual binding. I'm just showing you how I did it. That knocks off the old glue and any residue from the wood that came off.
Heating and stretching the old binding
Now this is the old binding. It's the base side with the Side Dots and I'm warming it in the heat gun so it becomes slightly pliable and will stretch a little bit. Some of the side dots stayed in the fretboard and I'm popping the binding over them. There's holes in the binding and they just seat right over the red side dots that are sticking out.
I managed to get within a 32nd of an inch of the end. It probably shrank a 16th when it came off. That's just what happens to old binding. This one, I'm pretty good. It's really tight. In fact, I have to separate it with a razor blade to get it off. I take the razor blade and remove the back so I have a thin piece of sharp steel that can slide right down the joint.
The glue up - working clean with messy hide glue
I'm getting ready for the glue up now. I'm going to use bottled Franklin Hide Glue [on-screen text reads: More open time than hot glue - Titebond Liquid Hide Glue from StewMac]. My dish is warm so the glue gets kind of slippery when it's warm. I'm sitting on top of my glue pot which has hot water in it and that's getting the bowls warm. Here's one bowl with hot water in it only. That's to clean the brush and keep it moist. The magnets hold me to the steel of my repair device there. That way I won't spill water or glue while I'm working.
Here's the messy part. That's what I made the little glue table for. You've got a lot of working time with bottled high glue, but you still got to keep moving. This is the part where I'll stretch over any dots that are in the board. A lot of them popped out and I actually am missing a couple of dots. I don't know where they went. Clean up as you go. Get the squeeze up. The cool thing was I could just tape it on as if it was a fingerboard being bound on the neck. Masking tape becomes the clamp. To hold it on the end I've got a Teflon strip here that you use for binding Pearl Inlays and such. I'm using that in between to press the binding into the end of the fretboard. When you take the binding off after the glue's dry, you go towards center. You don't pull it off the edge because you could loosen the binding.
Making and installing side dots
This is a pin vise with a 16th inch drill bit in it. I'm using that to clean out some of the glue squeeze out from the empty holes, any holes that didn't have dots in them, because I'm going to put dots back in that fell out or make my own dots as you'll see in a minute. There's a lot of different approaches for doing a binding job like this. Got some 320 Sandpaper here ready to go, and what I've got there is Binding Tape that I'm punching a hole into it with a leather punch.
Colored pencil side dots
For red dots, one way I go is to take the bright colored pencil that you get at the art store, not a bright red but kind of a dark greenish red, and I can use that as a dot. I do this with some amber super glue [on-screen text reads: Colored glues for repair work - StewMac Tinted Super Glue] going into the hole. It gives it an old look and it's good glue. Clean up that mess. In goes to the, ah, I might want a little more glue on that, and press it down in and let it set.
I'm using accelerator here to make it harden quicker. I'm doing something that you probably shouldn't do. I'm using the tube of the accelerator to apply it, but if you do that a lot, it's going to harden and it won't pump anymore. This is a Japanese Flush Cut Saw that cuts very close to the surface. Cut from both sides and in a second it'll break loose and you have a red side dot made out of colored pencil. I'll sand it first with that 320 and then get the tape off as quick as I can so it doesn't stick too much to that super glue. Next I'm going to punch a hole in a piece of cellophane tape that's only two thousandths of an inch thick and get even closer with the really smooth side of my nut and saddle file.
Epoxy side dots
Another way you can make dots, which I often do, is to use epoxy. This is five minute epoxy, and I've got ColorTone pigments [on-screen text reads: Brillian concentrated colors! - ColorTone Liquid Pigment for Lacquer] on the mixing board, red, brown, and green. I think this particular one is the lacquer based pigments, but I've done it with water based too. Now the red's too red, so I'm going to add brown, and I'm using a toothpick for each color so I don't spread one color into the next and then have to start over. That's pretty good, but now that's probably a little too brown. It doesn't take a lot of color to change it. Here's the finishing touch, a bit of green. Look how little I used. Just that touch and it's strong. That's the color I'm after a dark red brown. Then I can just work myself down the fretboard and make all the red dots that I need.


